h3.post-title font-family: 'Bad Script', cursive
Showing posts with label Christmas. Show all posts

Friday, 6 November 2026

Christmas Cards - Poinsettias

I have made two sets of Christmas cards for 2026, the first of these is a set of sixteen cards, 5" x 7", with layered poinsettia flowers. 


I cut watercolour paper to 4.5" x 6.5", then I used Distress Ink to apply a pattern through various Tim Holtz Layering Stencils. Next I added a selection of Distress Oxide Inks to the craft mat, sprayed with water and dipped the through the ink until I was happy with the distribution of colour. This was left to dry. 


Once dry, the watercolour paper was placed over metallic card to make a mount - 4.75" x 6.75". This was applied to the 5" x 7" card blank.


With Sizzix - Tim Holtz - Vault Seasonal Sketch Die Set, I cut the flowers and leaves in layers, I used metallic card for the top open layers, and vellum for the lower layer. 


I used pearls, dew drops, sequins and/or gems to embellish the cards and the flower centres. 


For the greeting I used another Tim Holtz Sizzix die set - Home for the Holidays. 


That's all for today, back with the second set of Christmas cards soon.
Thanks for looking.
Lynn x

Saturday, 3 January 2026

Our Dear Reindeer!

This is the last layout I have made with the Papermaze December kit. It shows our granddaughter last Christmas sporting a set of reindeer antlers, and enjoying a spear of asparagus. this Christmas themed kit is full of traditional colours, papers, Bazzill cardstock and a selection of embellishments.


To create this layout, I used the following items from the kit:
Simple Stories - Simple Vintage Believe collection - Holiday Traditions & Tag Elements
Simple Stories - All Wrapped Up collection - Magical Season
Graphic 45 - Deck the Halls collection - A Little Sparkle
Mintay Chippies - Xmas Wreath
Bazzill Basics -  Grenadine & Cinnamon Stick


I added the following items from my own stash:
Kraft Bazzill
Barn Door  and Picket Fence Distress Ink 
Tim Holtz Layering Stencil - Sparkle
Distress Paints - Lumberjack Plaid, Peeled Paint & Shabby Shutters
Glossy Accents 
Decorative Pins
3D foam pads
Simple Stories Vintage Christmas Lodge Farm Foam Stickers


That's all from the December kit. I'll be back with a new wintery kit for January in a few weeks' time.
Thanks for looking,
Lynn x

Thursday, 11 December 2025

Christmas Elf

For this layout I have used several photos of my granddaughter under the Christmas tree, in her red and white Christmas outfit, last Christmas. This is my second Christmas layout using the Papermaze December kit. The kit contains beautiful papers from Mintay, Simple Stories and Graphic 45.  


Please see the Scrap Paper Scissors Blog for details of how the layout was made.

The layout was made using the following items from the kit:
Mintay Papers - Holly Jolly collection - #02 & #04
Simple Stories - Vintage Believe - Foam Stickers 
Gold enamel dots

I used some additional items from my own stash:
49 and Market - Evergreen Season Chipboard Words
P13 Christmas Treats, Alpha Stickers


That's all for today, I'll be back with more from this kit soon.
Thanks for looking.
Lynn x

Wednesday, 10 December 2025

Victorian Day

This layout is about my son dressed for Victorian Day at his primary school. He decided to dress up as John Callcott Horsley, who designed the first Christmas card in 1843. This is one of my two design team layouts being shared on the Papermaze Blog today - using the December kit. The kit is now available in the shop, with its traditional colour pallet. 


For details of how the layout was made, please see the Scrap Paper Scissors blog.

To make this layout, I chose the following items from the kit:
Mintay Papers - Holly Jolly collection - #02
Simple Stories - Simple Vintage Believe collection - Holiday Traditions
Simple Stories - Simple Vintage Christmas Lodge Foam Stickers
Bazzill Basics - Coconut Swirl, Grenadine, Parakeet, Aspen and Parakeet 

From my own stash, I chose:
Distress Oxide Inks
TH Layering Stencil (Ornate THS076) 
Distress Mica Spray Stain Harvest Moon and Tart Cranberry 

Stampers Anonymous Cosy Christmas set CMS444 
Versafine Black Ink Pad
3D Foam Pads
Tim Holtz Sizzix Thinlits 'Holiday Greens' die set
49 and Market - Evergreen Season Chipboard Words


That's all for today, I'll be back with more from this kit tomorrow.
Thanks for looking.
Lynn x

Friday, 29 November 2024

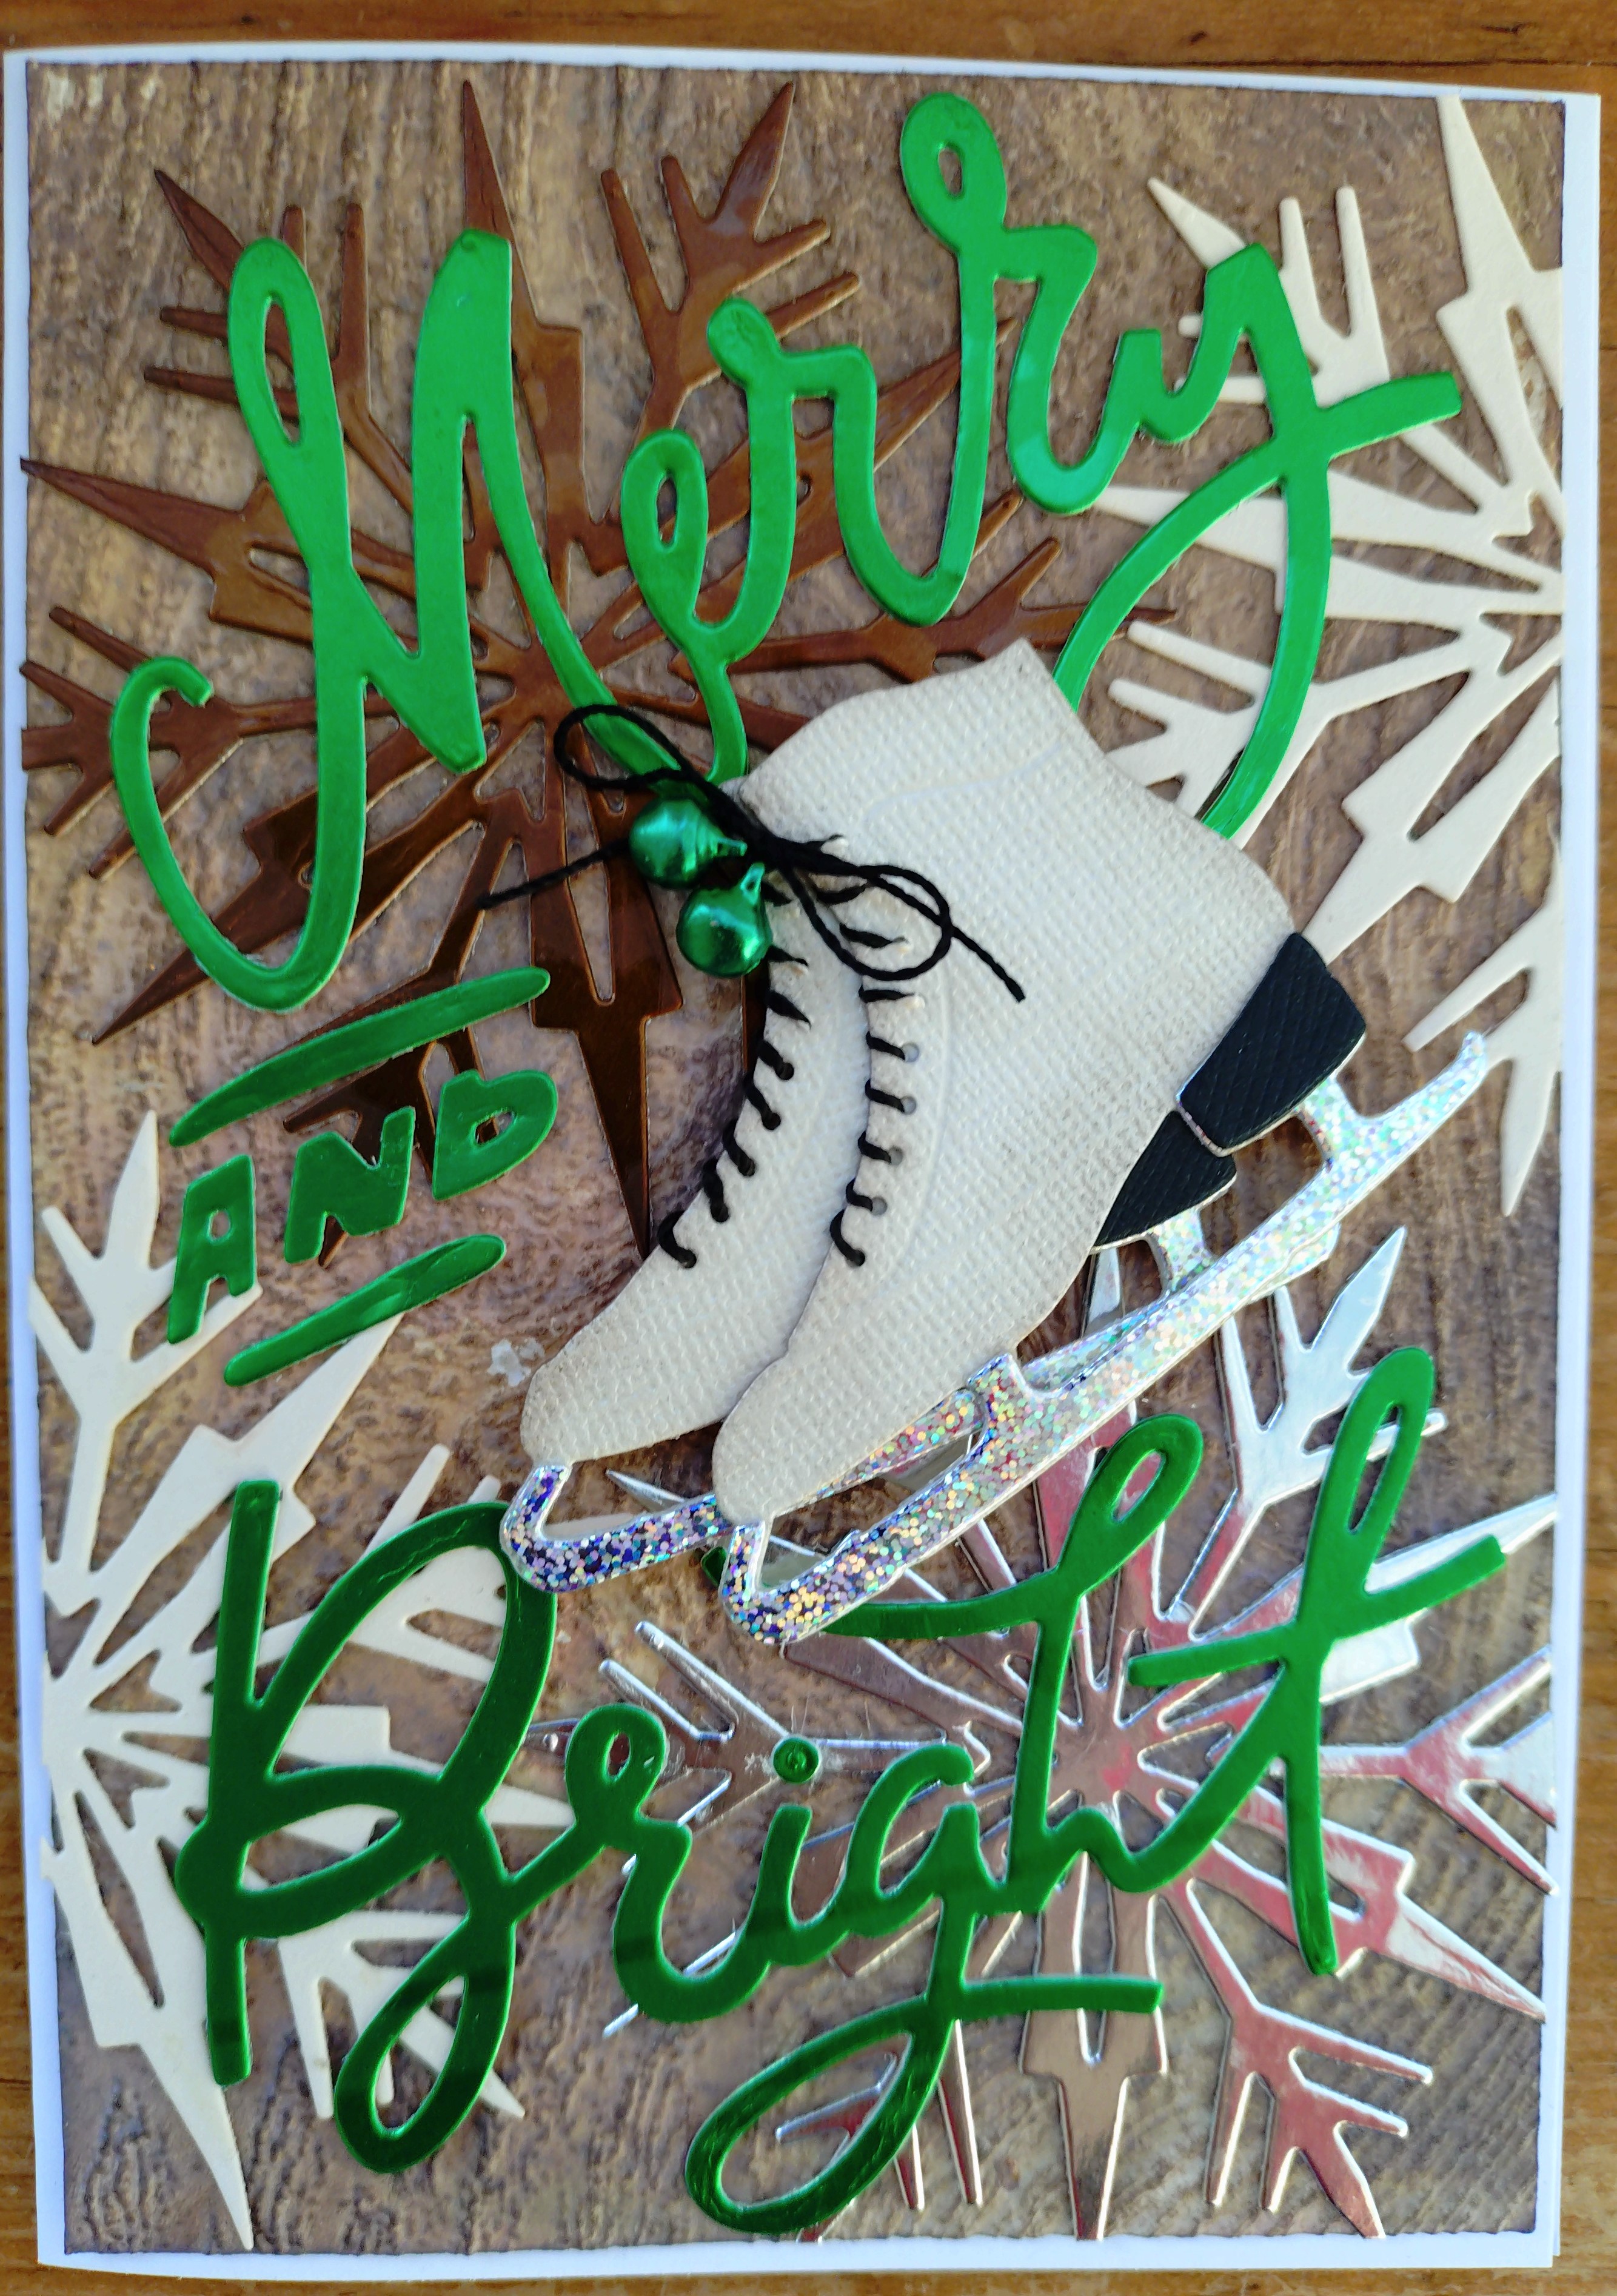
Vault Winter Wishes - Sizzix Christmas Cards

Today I'm sharing some Christmas cards I made using one of the Vault Christmas Sizzix Die Sets from Tim Holtz. I added in another of Tim's die sets and some 3D Texture Fades. Then got busy creating backgrounds with some multi media.


I used:

Sizzix Tim Holtz Thinlits Die - Vault Winter Wishes
Sizzix Tim Holtz Thinlits Die - Merry and Bright
Sizzix 3D Texture Fades - Arched, Brickwork, Lumbar, Quilted, Sparkle and Woodgrain.
Distress Oxide Inks
Distress Inks
Tiny Bells
DMC Crochet Cotton
Watercolour Paper
Card Blanks and Envelopes

Selection of cardstock and metallic cardstock scraps
3D Foam Pads

      
For each card I trimmed a piece of watercolour paper to measure slightly smaller than my card blank. I placed a selection of colours of Distress Oxide ink onto a messy mat. spritzed them with water and ran the paper back and forth through the colours to create the background for the card.

While the paper was still slightly damp, I place it into the 3D Texture Fade folder, and passed it through the Sizzix Big Shot. Then this was set aside to dry off completely.

I highlighted the embossed patterns by rubbing over with some Distress Inks and a blending tool.

With the Winter Wishes Die set, I cut two ice skates, heels and blades and three snowflakes,  from a selection of the scraps of cardstock and metallic card I had collected together. I also used the Merry and Bright die set to cut the phrase in metallic card.

I applied the snowflakes to the background, overlapping the edges in places and trimmed off the excess. This was then stuck to the front of the card blank.

I added the greeting placing it as seen in the photos.

Next I made up the ice skates, stitching the crochet cotton through the tiny holes in the boots to make them appear to be laced up, leaving enough
cotton to tie on the bells later. I placed one boot over the other at a slight angle so you can still see they are a pair. Then I tied the laces together in a knot. I threaded a tiny bell onto each lace, then tied the laces together into a bow, and trimmed the ends off neatly.

With 3D foam pads applied to the back of the ice skates, I attached them to the centre of the card.

Here is a closer view of each card.


That's all for today. Back with more for Christmas soon.
Lynn x