Another layout created at our weekend away a few weeks ago. I used the Golden Grove papers by Kaisercraft, for a little stash busting. The photo was taken of my daughter by her friend Gemma when they went to take autumnal pictures at Hall Place in Bexley. They were studying for their photography A level at the time.
I used a sheet of Collated, and with Distress Oxide Inks I stencilled leaves using a Tim Holtz Layering Stencil. I tore across a sheet of Fallen Leaves paper in half and stick this over the bottom half of the Collated paper. I staggered the photo with a series of mats cut from the collection.
The chipboard circle is from Dusty Attic and is from the Baroque Frame Set. I used Versamark Ink and Stampendous Frantage Embossing Enamel (Shabby White) to emboss the chipboard. I created some leaves, toad stalls and acorns using the Sizzix Funky Foilage Thinlits die set and paper scraps form the Golden Grove collection.
I added some gems to the chipboard.
For the title I used a Sizix Bigz XL alphabet die and a Thinlits set - cutout script and more papers from the collection.
Thanks for looking
Lynn x
Saturday, 11 May 2019
Friday, 10 May 2019
The Sweet Life
The photo was taken at one of our monthly crops last year, when we celebrated my birthday. The talented Anita surprised me by making cakes and altered the photo to bring out the blues.
I have been planning to scrap this photo for almost a year and had picked these Indigo Skies papers from Kaisercraft for the purpose.
The base is a sheet of Shibori with the white side up. Then the wooden strips were created from a sheet of Misty paper. The butterflies were fussy cut from a sheet of Chambray and the wings raised with foam pads. The butterflies were given a sparkle with some Nuvo Glitter Drops.
The lettering was cut from a sheet of Blue Moon Paper, and a little journalling was written on one of the wooden panels.
Thanks for looking
Lynn x
Monday, 18 March 2019
Distress Oxide Ink Blending Combos - Week 6
Oxide Combo 1 - Crushed Olive, Forest Moss, Chipped Sapphire
For this card I trimmed the blended card to fit the square card blank. Then with white card and a Tonic Studios die set I cut the 'Hey Blossom' parts and mounted them onto the coloured card.
Oxide Combo 2 - Mustard Seed, Rusty Hinge, Walnut Stain
I cut the dragonfly with a Tonic Studio from the blended card. The greeting is a die from Crafter's Companion. I added a few topaz gems.
Oxide Combo 3 - Shabby Shutters, Peacock Feathers, Faded Jeans
For this card I used a PaperArtsy JOFY stencil and stamps.
Oxide Combo 4 - Squeezed Lemonade, Carved Pumpkin, Barn Door.
For this card I used some Sizzix Tim Holtz Wild Flower Stem Thinlits dies. I cut these in black, then added an Avery Elle stamp in black ink, some splats of black ink and a few sequins.
Thanks for looking, I think this is the last set for now.
Lynn x
See previous week's cards here:
Week 1
Week 2
Week 3
Week 4
Week 5
Wednesday, 6 March 2019
Distress Oxide Ink Blending Combos - Week 5
Hello, here is my post for week 5 of the Distress Oxide ink blending combinations as set out by Kristina Werner's blog. You will find all the details and videos there to
inspire you. Week 5 of Kristina's colour blending can be found here. This week's selection concentrates on shades of blue. I have used my blends to make some cards for Mothering Sunday which is fast approaching.
Oxide Combo 1 - Twisted Citron, Salty Ocean, Blueprint Sketch
For the first card I used two different Tim Holtz Sizzix thinlits die sets (Wildflowers and Wildflower Stems #2), picking the dies that looked most like lavender. I cut as many as I could from the blended card, after flipping it upside-down. I tied them in a bunch with a narrow ribbon and then attached them to the card with some wet glue. My greeting is made with another Crafter's Companion die and some silver card. I added a touch of Stickles for a little sparkle.
Oxide Combo 2 - Tea Dye, Vintage Photo, Chipped Sapphire
For this first card I used a stamp from Tim Holtz Stampers Anonymous Flower Garden set. I stamped it three times with Black Archival Ink. I made a mask by stamping onto scrap paper and cutting the shape out. This allowed me to add the stems to the flowers without spoiling the blooms. I lifted some colour from the images using a paintbrush and some water. I sprinkled a little water over the whole piece. I cut the greeting with a Crafter's Companion die and the off cut from the blended card.
Oxide Combo 3 - Squeezed Lemonade, Lucky Clover, Mermaid Lagoon.
For this card I used one for the Tim Holtz Wildflowers die set to cut a selection of flowers from the blended card. As before I tied them in a bunch with narrow ribbon. I cut 'Mum' with another Crafter's Companion die.
Oxide Combo 4 - Scattered Straw, Broken China, Seedless Preserves.
For my last card of the week, I cut a circle with a stitched circle die from a Lil' Inker Designs. Then I die cut two stems in white card, using the Tim Holtz Sizzix Thinlits set - Wildflower Stems #2. The Crafter's Companion greeting was cut from the leftover blended card.
Thanks for looking, I will be back with week 6 as soon as the cards are made.
Lynn x
See previous week's cards here:Week 1
Week 2
Week 3Week 4
For the first card I used two different Tim Holtz Sizzix thinlits die sets (Wildflowers and Wildflower Stems #2), picking the dies that looked most like lavender. I cut as many as I could from the blended card, after flipping it upside-down. I tied them in a bunch with a narrow ribbon and then attached them to the card with some wet glue. My greeting is made with another Crafter's Companion die and some silver card. I added a touch of Stickles for a little sparkle.
Oxide Combo 2 - Tea Dye, Vintage Photo, Chipped Sapphire
For this first card I used a stamp from Tim Holtz Stampers Anonymous Flower Garden set. I stamped it three times with Black Archival Ink. I made a mask by stamping onto scrap paper and cutting the shape out. This allowed me to add the stems to the flowers without spoiling the blooms. I lifted some colour from the images using a paintbrush and some water. I sprinkled a little water over the whole piece. I cut the greeting with a Crafter's Companion die and the off cut from the blended card.
Oxide Combo 3 - Squeezed Lemonade, Lucky Clover, Mermaid Lagoon.
For this card I used one for the Tim Holtz Wildflowers die set to cut a selection of flowers from the blended card. As before I tied them in a bunch with narrow ribbon. I cut 'Mum' with another Crafter's Companion die.
Oxide Combo 4 - Scattered Straw, Broken China, Seedless Preserves.
For my last card of the week, I cut a circle with a stitched circle die from a Lil' Inker Designs. Then I die cut two stems in white card, using the Tim Holtz Sizzix Thinlits set - Wildflower Stems #2. The Crafter's Companion greeting was cut from the leftover blended card.
Thanks for looking, I will be back with week 6 as soon as the cards are made.
Lynn x
See previous week's cards here:Week 1
Week 2
Week 3Week 4
Monday, 25 February 2019
Distress Oxide Ink Blending Combos - Week 4
Hello, here is my belated post for week 4 of the Distress Oxide ink blending combinations as set out by Kristina Werner's blog. You will find all the details and videos there to inspire you. Week 4 of Kristina's colour blending can be found here. This week's selection concentrates on browns, greys and black.
I made my samples big enough to make into cards. I have treated them all with different techniques. For the blends I used Distress Oxide Inks, Mini Round Blending Tools and foam pads all purchased from Papermaze. In previous weeks I have used Neenah Classic Crest Solar White from Crafter's Companion, this time I have used watercolour paper.
Oxide Combo 1 - Cracked Pistachio, Faded Jeans, Dusty Concord
This card is a small 5" square card blank. I trimmed the blended card to fir and inked the edges. Then I cut my flower stem with one of the new dies from Tim Holtz Wildflower Stem set. The greeting is from Crafter's Companion. The card I die cut is also from Crafter's Companion - Centura Pearl.
Oxide Combo 2 - Shaded Lilac, Hickory Smoke, Black Soot
For this card I used Tonic Studios Wings and Things dies to cut the butterfly from silver miri card and and the body from black card. Then I cut a shadow for the wings from the blended card. This was mounted on the card blank with 3D foam pads. The greeting is Crafter's Companion.
Oxide Combo 3 - Picked Raspberry, Wilted Violet, Blueprint Sketch
This card was created with another Tonic Studios die set. I cut the die twice onto one piece of white card and cut it out to make a square frame. this was layered over the blended card. The flowers remaining from the die cut were inked and curled than stuck back into place with a dot of glue in the centre only. This allowed the blended colours to show through.
I used miri card to mount the design onto and to cut a greeting (Crafter's Companion). Large flat-blacked pearls were added to the centre of each flower.
Oxide Combo 4 - Milled Lavender, Victorian Velvet, Aged Mahogany
The last card for this week was made with more of the Wings and Things Tonic Studio dies. I die cut directly into the blended card this time. The butterfly was stuck onto the card blank along the body only, so the wings move. The greeting is from Crafter's Companion again and the words and butterflied have a light touch of glitter added with Nuvo Crystal Glitter Drops.
Thanks for looking, I will be back with week 5 as soon as the cards are made.
Lynn x
See previous week's cards here:
Week 1
Week 2
Week 3
Monday, 18 February 2019
It's Raining Men & Beautiful Bride
Here are my first Papermaze layouts and details of the January kit. Both
these layouts have photos taken at my nephew's wedding last September.
As always the kit has a lovely combination of papers, card and
embellishments. A beautiful range of purples, blues and aqua with a
touch of sparkle. Please see Scrap Paper Scissors Blog for details
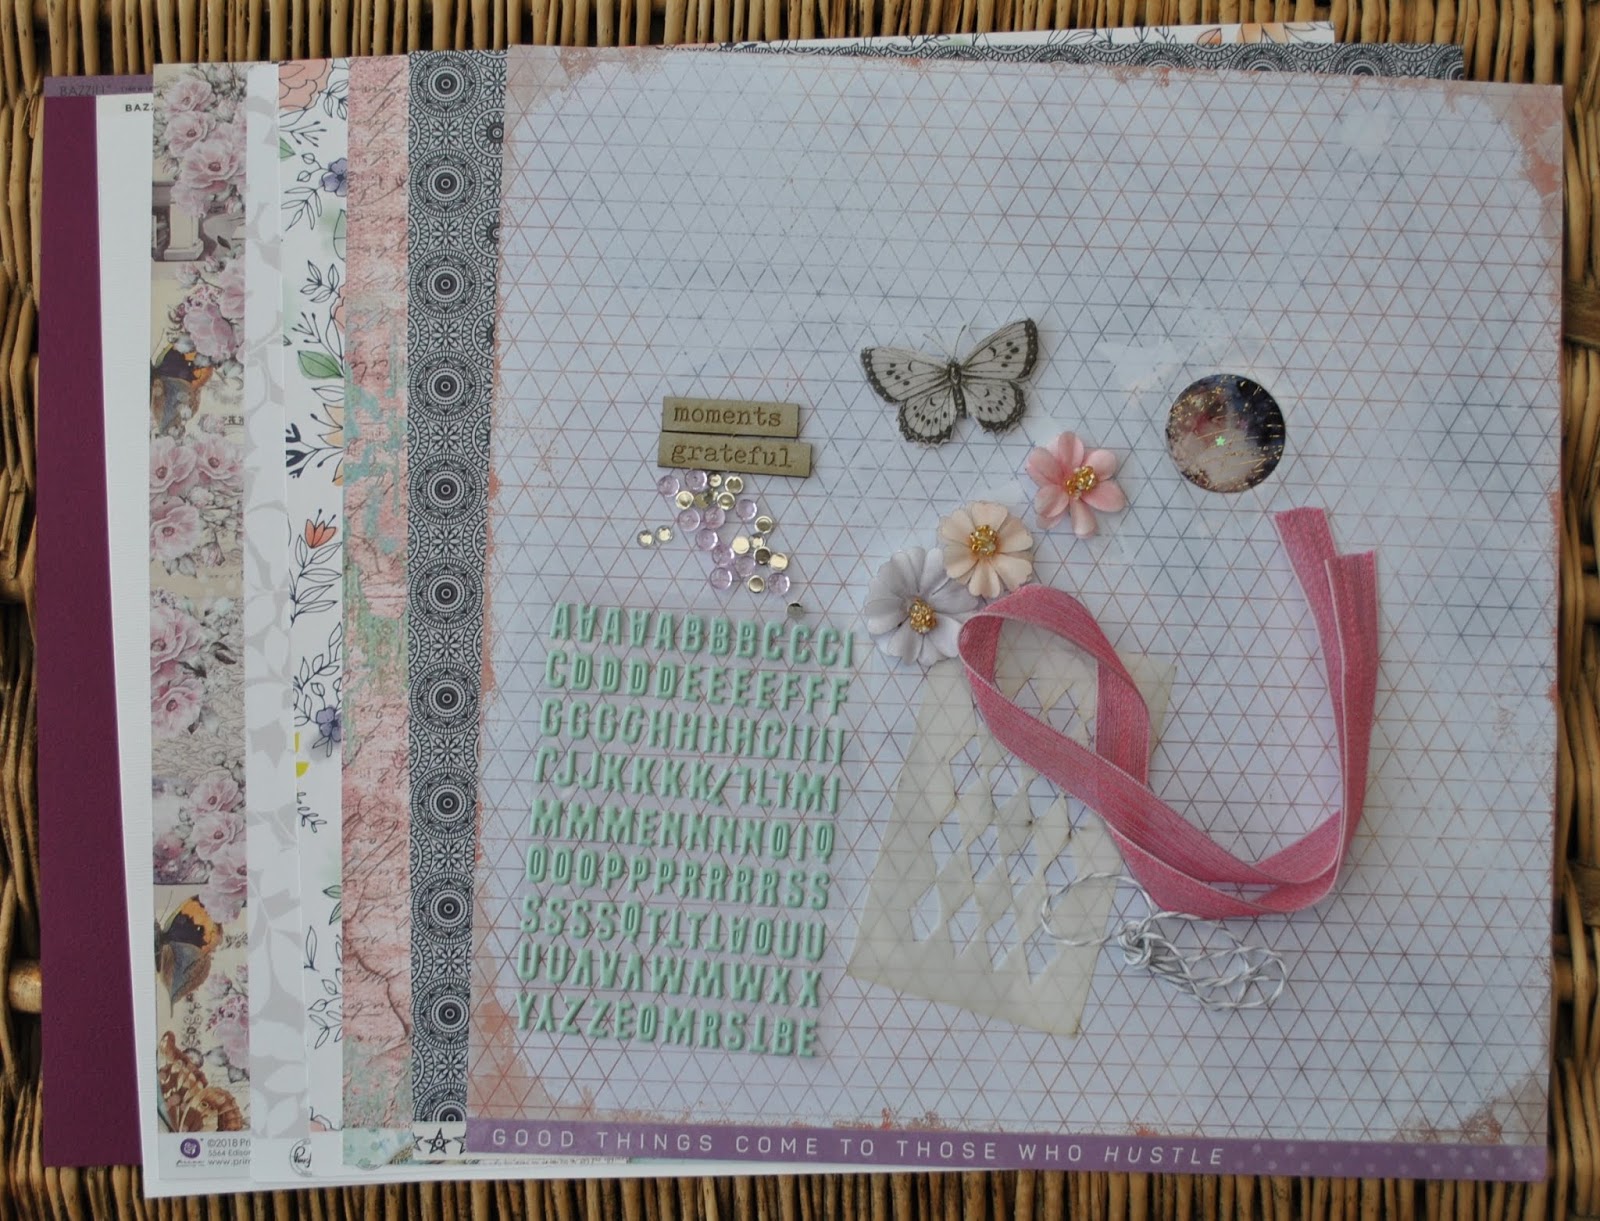
First of all here is a photo of the kit and details of what it contains. The kit is currently available in the shop and remains excellent value for money at just £10.00
Patterned Papers:
Pinkfresh Studio - Indigo Hills 2 Collection - Glen & Gorge
Prima - Moon Child Collection - Love Constellations (foiled)
Kaisercraft - Misty Mountains Collection - Eclipse
Kaisercraft - Stargazer Collection - Orbit
Stamperia - Wonderland - Dragonfly
Bazzill Basics: Avalanche & Mardi Gras
Extra Bazzill Pack: Quartz, Admiral, Whirlpool & Smoky
Embellishments: Exclusive Papermaze stencil, Pinkfresh Alpha, Prima butterfly, 3 Prima flowers, 50cm ribbon, 2 Dusty Attic words, 50cm Baker's twine, Prima Enamel Sticker,10 Dew Drops, 15 gems.
Beautiful Bride is the title of my first layout, although the colours of the papers are perfect for the wedding, I chose a black and white photographs of my nephew's bride.
The backdrop for this layout is the foiled side of Prima's Moon Child - Constellations. It's difficult to show off the quality of the foiled dots in the photo. I added more sparkle using the exclusive stencil from the kit, together with texture paste and some ultrafine glitter. I sprinkled the glitter onto the paste while it was still wet. Once dry, I worked out where I wanted my photo to sit and gutted a piece of paper approx. 4.5" x 4.5" from the centre. I did a little fussy cutting from this piece and set them aside for later.
I picked three different small doilies from my stash and arranged them where I wanted them to sit under my photo, and covering the gutted hole. Using the Mardi Gras Bazzill, I made a photo mount, and cut some ferns using dies from Funky Florals #1 set (Tim Holtz Sizzix Thinlits). I also cut my title from the same cardstock - I used a Sizzix Sizzlits Alphabet (Boxed Brush) and a Tim Holtz die from the Handwritten Love Thinlits set.
After sticking the photo into place I arrranged flowers around it, I using flowers from the kit plus a few extra smaller flowers from my stash and the flowers I cut from the reverse of the paper earlier. I added the enamel Sticker from the kit, this pretty moon has a real sparkle from the stars and shine from the glossy surface. I also added the ferns cut from Bazzill.
The title was glued in place, and silver Stickles was added to the centre of the cut out flowers. Finally I added the flat-backed gems to one of the doilies in a circle.
It's Raining Men is my second layout from the same wedding.
I picked from the blue and white papers for this layout. I started by gutting the Admiral Bazzill, so I had a frame of about 1" all round. I trimmed the Orbit paper to 11.5" x 11.5" then gutted it so I had a frame of 1.5". The Orbit paper frame was mounted centrally over the Admiral cardstock frame. I then cut the Smoky Bazzill to 9.5" x 9.5" and mounted this over the other two.
The next few bits of cutting will depend on the size of your photo, but as a guide mine are as follows. Use the Admiral Bazzill to make a photo mount 6" x 4.2", a journalling block mount 3" x 4.2" and then a mount for the bottom panel 9.2" x 4.2". I cut some lined paper for the journalling and trimmed down one side with an ek success punch (spiral bound notebook edge), I cut a band of the stripe side of Eclipse paper, with the stripes running vertically. I hand stitched seven stems with leaves onto this paper using embroidery thread.
Mount the photo, journalling panel and patterned paper onto the Bazzill mounts and arrange onto the layout, leaving a gap of about 1" in the centre for the flowers. I then glued a paper daisy at the top of each stem across the middle of the page.
My title was designed and cut using my Cricut Design Space and the remainder of the Admiral Bazzill. I stuck this onto the layout and covered it in Glossy Accents.
After writing the journalling and arranging the butterfly from the kit, I added a trail of sparkle along the journalling block and wings with Crystal Stickles.
That's it for today, but I have more layouts made with this kit to share soon.
Thanks for looking.
Lynn
First of all here is a photo of the kit and details of what it contains. The kit is currently available in the shop and remains excellent value for money at just £10.00
Patterned Papers:
Pinkfresh Studio - Indigo Hills 2 Collection - Glen & Gorge
Prima - Moon Child Collection - Love Constellations (foiled)
Kaisercraft - Misty Mountains Collection - Eclipse
Kaisercraft - Stargazer Collection - Orbit
Stamperia - Wonderland - Dragonfly
Bazzill Basics: Avalanche & Mardi Gras
Extra Bazzill Pack: Quartz, Admiral, Whirlpool & Smoky
Embellishments: Exclusive Papermaze stencil, Pinkfresh Alpha, Prima butterfly, 3 Prima flowers, 50cm ribbon, 2 Dusty Attic words, 50cm Baker's twine, Prima Enamel Sticker,10 Dew Drops, 15 gems.
Beautiful Bride is the title of my first layout, although the colours of the papers are perfect for the wedding, I chose a black and white photographs of my nephew's bride.
The backdrop for this layout is the foiled side of Prima's Moon Child - Constellations. It's difficult to show off the quality of the foiled dots in the photo. I added more sparkle using the exclusive stencil from the kit, together with texture paste and some ultrafine glitter. I sprinkled the glitter onto the paste while it was still wet. Once dry, I worked out where I wanted my photo to sit and gutted a piece of paper approx. 4.5" x 4.5" from the centre. I did a little fussy cutting from this piece and set them aside for later.
I picked three different small doilies from my stash and arranged them where I wanted them to sit under my photo, and covering the gutted hole. Using the Mardi Gras Bazzill, I made a photo mount, and cut some ferns using dies from Funky Florals #1 set (Tim Holtz Sizzix Thinlits). I also cut my title from the same cardstock - I used a Sizzix Sizzlits Alphabet (Boxed Brush) and a Tim Holtz die from the Handwritten Love Thinlits set.
After sticking the photo into place I arrranged flowers around it, I using flowers from the kit plus a few extra smaller flowers from my stash and the flowers I cut from the reverse of the paper earlier. I added the enamel Sticker from the kit, this pretty moon has a real sparkle from the stars and shine from the glossy surface. I also added the ferns cut from Bazzill.
The title was glued in place, and silver Stickles was added to the centre of the cut out flowers. Finally I added the flat-backed gems to one of the doilies in a circle.
I picked from the blue and white papers for this layout. I started by gutting the Admiral Bazzill, so I had a frame of about 1" all round. I trimmed the Orbit paper to 11.5" x 11.5" then gutted it so I had a frame of 1.5". The Orbit paper frame was mounted centrally over the Admiral cardstock frame. I then cut the Smoky Bazzill to 9.5" x 9.5" and mounted this over the other two.
The next few bits of cutting will depend on the size of your photo, but as a guide mine are as follows. Use the Admiral Bazzill to make a photo mount 6" x 4.2", a journalling block mount 3" x 4.2" and then a mount for the bottom panel 9.2" x 4.2". I cut some lined paper for the journalling and trimmed down one side with an ek success punch (spiral bound notebook edge), I cut a band of the stripe side of Eclipse paper, with the stripes running vertically. I hand stitched seven stems with leaves onto this paper using embroidery thread.
Mount the photo, journalling panel and patterned paper onto the Bazzill mounts and arrange onto the layout, leaving a gap of about 1" in the centre for the flowers. I then glued a paper daisy at the top of each stem across the middle of the page.
My title was designed and cut using my Cricut Design Space and the remainder of the Admiral Bazzill. I stuck this onto the layout and covered it in Glossy Accents.
After writing the journalling and arranging the butterfly from the kit, I added a trail of sparkle along the journalling block and wings with Crystal Stickles.
That's it for today, but I have more layouts made with this kit to share soon.
Thanks for looking.
Lynn
Sunday, 17 February 2019
Distress Oxide Ink Blending Combos - Week 3
Today I'm here with some more Distress Oxide ink blending combinations as set out by Kristina Werner's blog. You will find all the details and videos there to
inspire you. Week 3 of Kristina's colour blending can be found here. This week's selection concentrates on browns, greys and black.
I made my samples big enough to make into cards. I have treated them all with different techniques. For the blends I used Distress Oxide Inks, Mini Round Blending Tools and foam pads all purchased from Papermaze. I purchased the Neenah Classic Crest Solar White from Crafter's Companion.
Oxide Combo 1 - Scattered Straw, Frayed Burlap, Gathered Twigs
To make this card I used a Kraft card blank and mounted the blended card onto some grey Bazzill.
Then I cut a coffee cup using the Fresh Brewed Sizzix Bigz die from Tim Holtz. I cut this with some corrugated card, and Bazzill scraps in grey and white. I cut a heart from white card and inked this lightly with some Gathered Twigs Distress Oxide. Then with sentiment stamps from Kraftin' Kimmie, I stamped and heat embossed in black onto a scrap of the blended card. I sprinkled a few drops of water onto the big heart.
Oxide Combo 2 - Old Paper, Evergreen Bough, Black Soot
For this card I used a Tim Holtz Sizzix Thinlits die set - Swirling Stars, cutting the stars from the blended card. This was mounted onto silver miri card. The greeting is a Tim Holtz rubber stamp,finishing off with some gems to add extra sparkle.
Oxide Combo 3 - Pumice Stone, Weathered Wood, Faded Jeans
For the third card I die cut the flowers in black Bazzill with Memory Box dies - Chloe Stem and Chandra Stem. I also cut a greeting and punched some butterflies (Martha Stewart).
Gems were added to the flowers and white Nuvo Crystal drops to the card and butterflies.
Oxide Combo 4 - Picked Raspberry, Aged Mahogany, Ground Espresso
For this Valentine card I used some Tonic Studios heart dies and Crafter's Companion greetings dies, all tied up with a scrap of ribbon.
Back with the next four cards soon.
Thanks for looking
Lynn x
See previous week's cards here:
Week 1
Week 2
I made my samples big enough to make into cards. I have treated them all with different techniques. For the blends I used Distress Oxide Inks, Mini Round Blending Tools and foam pads all purchased from Papermaze. I purchased the Neenah Classic Crest Solar White from Crafter's Companion.
Oxide Combo 1 - Scattered Straw, Frayed Burlap, Gathered Twigs
To make this card I used a Kraft card blank and mounted the blended card onto some grey Bazzill.
Then I cut a coffee cup using the Fresh Brewed Sizzix Bigz die from Tim Holtz. I cut this with some corrugated card, and Bazzill scraps in grey and white. I cut a heart from white card and inked this lightly with some Gathered Twigs Distress Oxide. Then with sentiment stamps from Kraftin' Kimmie, I stamped and heat embossed in black onto a scrap of the blended card. I sprinkled a few drops of water onto the big heart.
Oxide Combo 2 - Old Paper, Evergreen Bough, Black Soot
For this card I used a Tim Holtz Sizzix Thinlits die set - Swirling Stars, cutting the stars from the blended card. This was mounted onto silver miri card. The greeting is a Tim Holtz rubber stamp,finishing off with some gems to add extra sparkle.
For the third card I die cut the flowers in black Bazzill with Memory Box dies - Chloe Stem and Chandra Stem. I also cut a greeting and punched some butterflies (Martha Stewart).
Gems were added to the flowers and white Nuvo Crystal drops to the card and butterflies.
Oxide Combo 4 - Picked Raspberry, Aged Mahogany, Ground Espresso
For this Valentine card I used some Tonic Studios heart dies and Crafter's Companion greetings dies, all tied up with a scrap of ribbon.
Back with the next four cards soon.
Thanks for looking
Lynn x
See previous week's cards here:
Week 1
Week 2
Subscribe to:
Posts (Atom)