h3.post-title font-family: 'Bad Script', cursive

Thursday 31 December 2020

Gift Wrapped!

Meet Stanley! One of my sister's new kittens (Dougie to follow). This photo was taken after about a week of her welcoming the kittens to her home.

This layout is for today's FTLOFF Cake Day (6th Anniversary) first challenge - titled Battenberg. The aim is to use a 4 square gird and / or a pair of colours. So I went for red and white and a gift parcel effect, which divides the page into 4 parts. 

For this layout I dug into my store of prescious stash, that I have been saving for something special.

The border is a paper from Magnolia Ink's Sweet Christmas Dreams collection and is called Lingonberry Christmas.

Over this I added a sheet of trimmed white Bazzill, after splattering it with red, white, balck and silver acrylic paint.

The photo was mounted onto some Basic Grey's Black Tie collection background papers (scraps). These are great because they are distressed they are no solid colour and have many other colours running through them.

I tied a bow in dark red ribbon, matching the ribbon in the photo as closely as I could. To this I added two tiny silver bells, just like on Stanley's collar.

The letters for the title (and stars) are from my stash and an old glittery red alphabet from Making Memories, and some silver glitter letters of unknown manufacturer.

The label sticker is another treasure from Basic Grey.

Back soon with a layout featureing little Dougie.
Thanks for looking
Lynn x

Wednesday 30 December 2020

Happy 50th Birthday Elaine

My brother asked me to make a card for his wife Elaine's 50th birthday earlier this month. I took inspiration from Kath Evans on the Sizzix website and Cathie Cowles on her blog.

I used watercolour paper and a selection of Distress Oxide Inks. The dies are a Tim Holtz Sizzix Thinlits set called Happy Hour.

I used Glossy Accents to make the glasses look shine, and a touch of Stickles to add sparkle to the ice cubes and fizzy drinks.


I splashed some Dylusions Black Marble Ink spray over the background paper, before adding the elements.

The letters were cut using Tonic Studios Windsor letter and number dies, and a Hero Arts greeting die.

Happy Birthday Elaine.
Thanks for looking
Lynn xxx

Wednesday 23 December 2020

Mrs. Claus

 ... and now Mrs. Claus, completed to go with Santa. Another character designed by Larissa Holland (mmmcrafts), and part of the Twas The Night Before Christmas collection.


They now both hang on the tree togehter.


Next I hope to make the Little Elves.
Thanks for looking
Lynn


Tuesday 22 December 2020

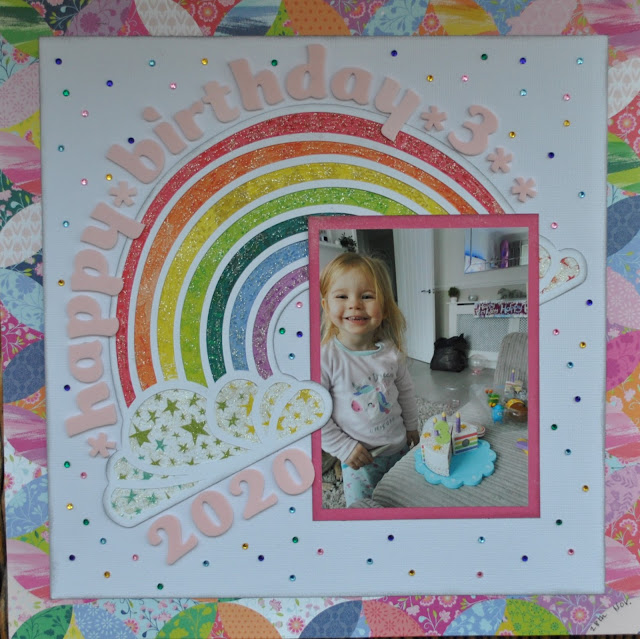
Happy 3rd Birthday

This little girl is a very colourful character, and so this photo of her having (wooden) birthday cake for breakfast on her birthday was ideal for this week's FTLOPP challenge.

The task for week 10 of the Be Colourful challenge was to use all nine colours from the previous weeks. So I have used - Sapphire, fuchsia, yellow, white, tangerine, purple, purple, teal and scarlet.


I used a rainbow cut file by Paige Taylor Evans - Paige by Page, cut from white Bazzill. I also used white Bazzill for the base of the layout.

Some of the papers are also by Paige Taylor Evans - Pink Paislee Horizon #12 for the frame, and scraps of #3 for backing the cutfile.

The star paper backing the clouds is from Shimelle's Field Trip collection - Stay Curious.

The title is created with American Crafts Foam Thickers.

The coloured areas of the rainbow have been given a sparkle with some Nuvy Crystal Drops - Gold Coast. Finally I added a smatterine of timy gems.

Thanks for looking.
Lynn x

Monday 21 December 2020

Santa Claus

Here is my version of Santa Claus tree decoration, designed by Larissa Holland - mmmcrafts

Having made the 12 days of Christmas decorations I was delighted to see that Larissa had added to her collection. He is made with wool felt, with pipe cleaners, beads, sequins and embroidery threads.


Difficult to get a good photo in today's fading light.


I have made a start on Mrs Claus and will add her to the blog when she is finished.

Thanks for looking.
Lynn x


Saturday 19 December 2020

Enchant - CSI 339

Another case solved for the CSI challenge - #339. I sude a photograph I took in Washington D.C. last Christmas. We decided to visit the world's largest light maze on the night before I left to return home.  

I used papers from the Bo Bunny - Carousel Christmas collection

to address the clues:
Polka Dots - Papers
Christmas or winter themed elements - fussy cut items from the paper collection
Shiny Things - sequins, holographic card for title
Banners - cut from paper
Pom-poms - trim
Deer or other animals - reindeer
Topic - Document a Christmas event


Thanks for looking,
Lynn x

Friday 18 December 2020

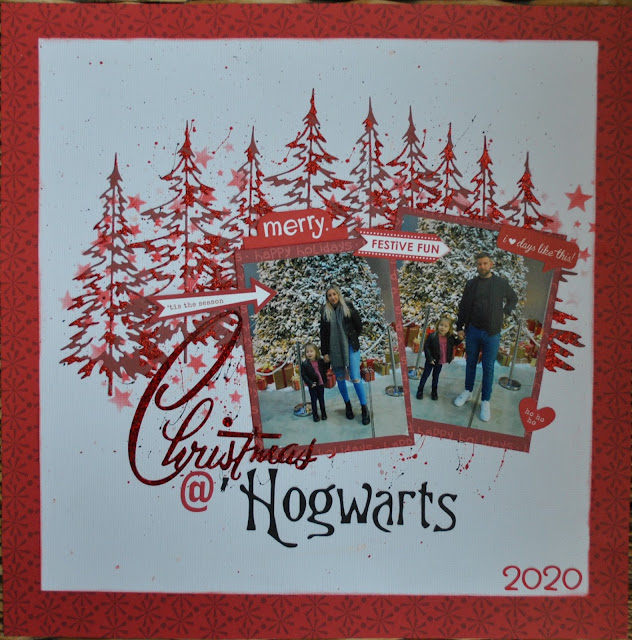
Christmas @ Hogwarts

Little Scarlett with her parents visited Harry Potter World recently and enjoyed the attraction all done up for Christmas.

In these photos they are standing infront of the big Christmas Tree. As the tree was surrounded by gifts wrapped in red, I decided the photos would be ideal for this week's FTLOPP Be Colourful challenge - Sumptious Scarlet. 


I used:
White Bazzill
Bella BLVD - Christmas Cheer collection - Jingle All The Way and stickers
Making Memories - Fa La La - Glittered Poinsettia Red
S.E.I. - Doodley-doo Holiday - Tree Trimmings
Red Glitter Card
Doodlebug Design letter stickers
Simple Stories Sn@p Stickers
Cricut and Burton's Nightmare font
Echo Park Star Stencil
Distress Ink - Candied Apple
Distress Paint - Candied Apple, Festive Berries, Picket Fence, Black Soot
Sizzix Thinlits - Woodlands and Retro Merry Christmas

Thanks for looking,
Lynn x


Tuesday 15 December 2020

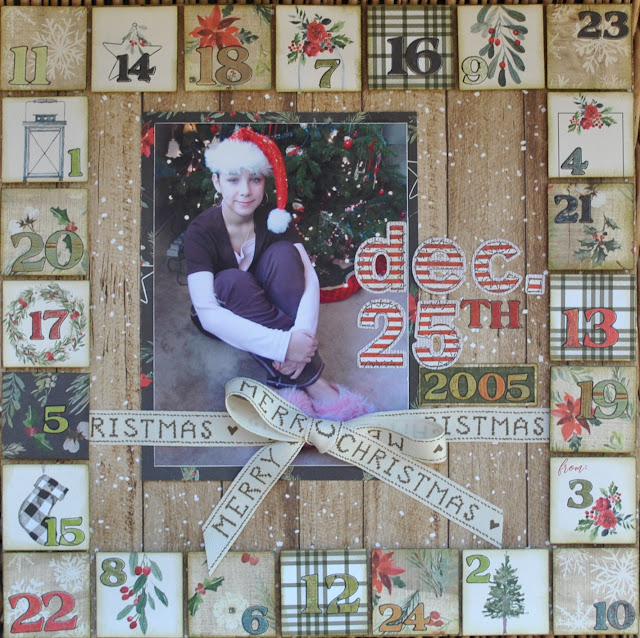
Christmas Countdown - CSI 341

For the December cold Case 341 over on CSI, here is my layout to solve the case.

The photo is of Catherine when she was 13, in front of our Christmas Tree. I liked the image used for the scene and with all the numbers, decided to create an Advent Calendar style layout.

Here are the clues:


The clues I managed to match with my layout are:
Older papers that match some of the colours in the scene
Older Christmas papers
Older woodgrain paper (Carta Bella - Christmas collection)
Use up some Number Stickers (Lots of Basic Grey Number Stickers)
Use Ribbon (Christmas Ribbon)
Use a Grid as your layout composition
Create a patchwork background - (1.7" squares all around the border)
Doodle - around all the numbers

Thanks for looking
Lynn x

Sunday 13 December 2020

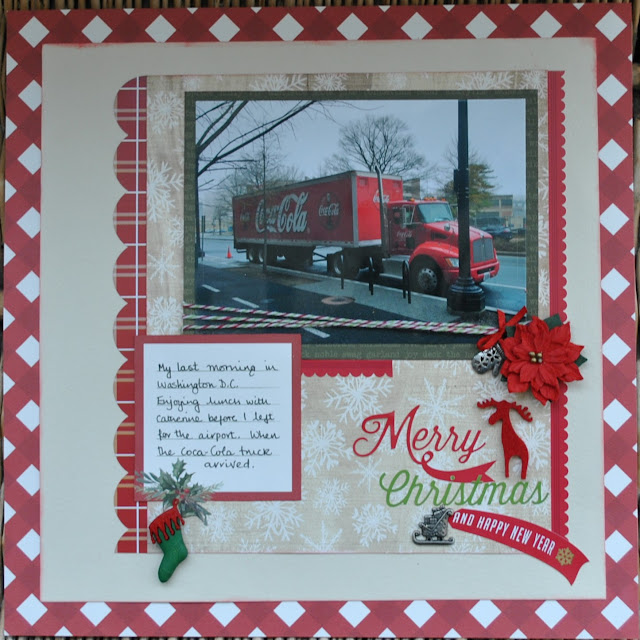
Coca-Cola Truck - CSI 340

For the 340 CSI challenge I have created a layout with this Coca-Cola truck which we saw while in Washington D. C. last December. 


From the clues I chose to use:


Plaid, wood grain and text pattern paper Carta Bella Christmas collection papers and stickers
Christmas / Winter themed elements
Something fuzzy (felt reindeer)
Metal (charms)
Ribbon
Baker's Twine
Frame (for journalling)
Cursive font
Topic - Document Christmas
Presentation - Write the journalling in a frame
Inspirational word - Merry


Saturday 12 December 2020

Nutcracker Lego

Hello, back today with the second layout using the Christmasy December Papermaze Kit. Although the papers are all from winter or Christmas collections, at least one side of most of them can be used to create non-Christmas layouts. Please see the Scrap Paper Scissors Blog for full details.

Last year we purchased and made this Christmas Lego to add to our collection.

From the kit I used:
Simple Stories - Winter Cottage collection - Season of Wonder
Carta Bella - Farmhouse Christmas collection - Gift Tags
Simple Stories - Jingle All The Way collection  - December Details
Walnut and Aspen Bazzill
Wooden Star
Tree Stamp
Paper roses

From my stash I used:
paper flowers
Twig wreath
red ribbon
Basic Grey letter stickers
Sizzix Thinlits Woodlands die set
fabric holly leaves
Nuvo Crystal Drops (Dandelion Yellow)

That's all for part one. I will be back with two more layouts in a few weeks.
Thanks for looking
Lynn x

Friday 11 December 2020

Merry and Bright

I have two layouts over on the Papermaze Blog using the December Kit today. Here is the first one of them. For full details please see the Scrap Paper Scissors Blog.


I found this colour slide picture of my sister by the Christmas tree with new Pinky and Perky toys - Christmas 1964. Brought back memories of our childhood home and Christmases.

From the kit I used:
Photo Play - Christmas Cheer collection - Silent Night
Simple Stories - Winter Cottage collection - Season of Wonder
Ruby Slipper & Fig Swirl Bazzill
Washi Tape

From my Stash I used:
Silver embroidery thread
MDF bauble
acrylic paints
Glossy Accents
silver ric-rac
silver ribbon
silver bells
3D foam tape
Sizzix Thinlits - Shadow Script Christmas die set.
Cricut
Distress Ink

Thanks for looking
Lynn x

Wednesday 9 December 2020

Edgar & Ava

Here is my layout for the 'For The Love Of Pretty Paper's' - Be Colourful - Week 8 Challenge - Totally Teal.

This photo was taken by my nephew of his wife, Kerry-Ann - who makes a good Ava with the John Lewis / Waitrose store Mascot - exciteable Edgar the dragon.


I used a sheet of light blue Bazzill, various papers from Kaisercraft's Sea Breeze collection and a sheet from Little Yellow Bicycle. 

Thanks for looking.
Lynn x

Thursday 3 December 2020

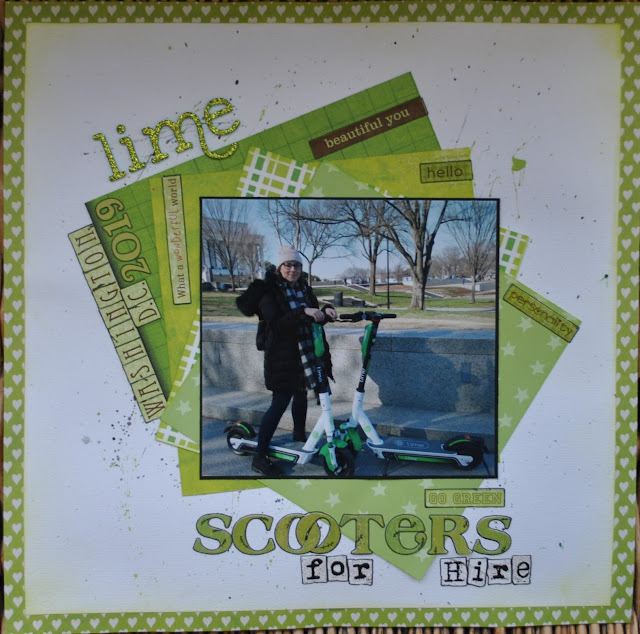
Lime Scooters

Here is my layout for For The Love Of Pretty Paper's - Be Colourful - Week 7 Challenge - Georgous Green. The bonus is to use layers.


 I used a photo from my trip to Washington D.C. last December to visit Catherine.

I used a sheet of White Bazzill and splattered some acrylic paints  over the page using grey, black, lime and green paints.

The border is Echo Park - Beautiful Life collection - Borders paper (heart side).
Layers are Bo Bunny Believe, and some Dream Street Papers.

For the title I used Thickers Glittery foam cucumber letters, and some Bo Bunny combo stickers. 

Thanks for looking
Lynn x
I

The Prior's Pumpkin Patch

I'm back today with the forth of my DT layouts using the November Papermaze Kit.

For my last page I selected this photo of my little niece. She is sitting on the doorstep proudly showing off the carved pumpkins the family picked and carved the day before. 


This layout makes good use of the patterned paper left over from the previous three layouts. The base is the sheet of Fawn Bazzill. 

From the kit I used:

Cocoa Vanilla - Day Dream - Daisy Days and Sweet Serenity
Pebbles - Jen Hadfield - The Avenue - 2nd Avenue and 3rd Avenue
Vicki Boutin - Story Teller - Memoir
Pinkfresh Studio - Days of Splendor - My
Favourite
Bazzill Basics
Black and Fawn
mini black doily
wooden dots
Cocoa Vanilla Puffy Heart
Prima layered heart sticker

From my stash I used:
white card
Basic Grey alphabet sticker sheets
fine black pen
paper leaves

That's all for the November kit, although there is still plenty left over as usual. I'll be back with the December kit later in the month.

Thanks for looking
Lynn x

Wednesday 2 December 2020

Autumn Leaves

Here is the third layout I have made for the Design Team using the November Papermaze Kit.The lovely soft colours in this collection are ideal for creating layouts displaying photos of russet, wind swept foliage, fallen fir cones, berries and fields of pumpkins.

This photo shows Emily during her red hair phase. She was visiting Hall Place, Bexley to do an autumn photo shoot together with a fellow A level photography student. The photo reminds me of the line about autumn leaves from the 'Windmills of your Mind' song. Although I slightly changed the words for my long title, otherwise it would have been even longer!

From the Kit I used:
Pinkfresh Studio - Days of Splendor - My Favourite
Pebbles - Jen Hadfield - The Avenue - 2nd Avenue
Cocoa Vanilla - Day Dream - Sweet Serenity
Black Bazzill
Tando Creative Mini Tags pack
6 dew drops
5 paper flowers
24" Twine

From my stash I used:
Antique Bronze Distress Paint
"
Sizzix 'Vintage Lace' Sizzlit die
Gesso
Distress Oxide
Gilding flakes
Letter stickers

Once more from the November kit tomorrow.

Thanks for looking
Lynn x

Saturday 28 November 2020

Happy Birthday Scarlett

Today is Scarlett's 3rd Birthday and I made her a clock and a card. They were based on the theme of a layout I made recently with a photo of her dressed as a ladybird.

I have already shared the layout. But today I'm sharing the card and clock.
I had some clock mechanisms and the chipboard clock faces left from projects I had done at Cardinal colours a few years ago. So together with the Cricut and Doodlebug Designs papers. I created a birthday set for little Scarlett's 3rd birthday. 

I made a gift box in which to keep the box safe.


Happy birthday Scarlett. xxx

Thanks for looking.
Lynn x

Thursday 26 November 2020

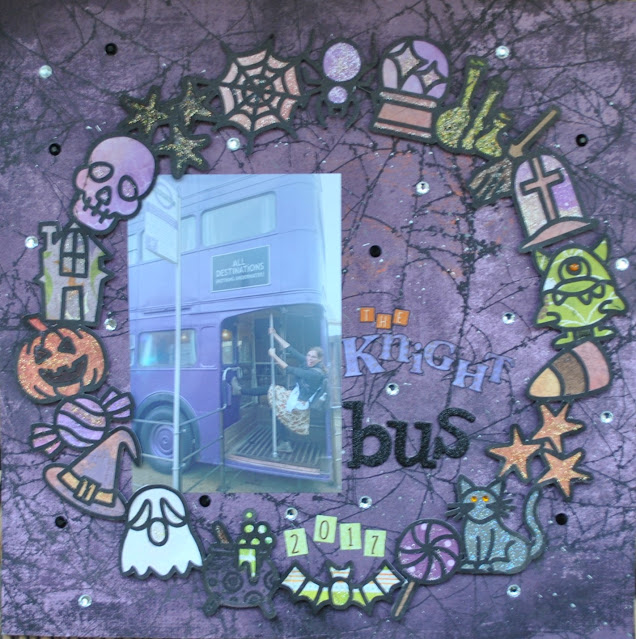
The Knight Bus

I made this layout with a photo form our trip to Harry Potter World for Emily's hen do in 2017. The layout was created for the For The Love of Pretty Paper - Be colourful challenge - Week 6 - Precious Purple. The bonus was to use mixed media. I don't often scrap with purple, but found these Basic Grey Eerie papers to use with this halloween cut file.


For this page I used papers from an old Basic Grey collection - Eerie
I splattered the base sheet 'Freak' with grey and white acrylic paint.
I cut the Paige Taylor Evans cut file - Halloween Wreath using the Cricut and a sheet of black paper from the Eerie collection. I backed the images with scraps of papers from various different collections.
I embellished the images with Nuvo Glitter Drops and some gems.
the title is some Basic Grey letter stickers, and Thickers.
Thanks for looking
Lynn x

Wednesday 25 November 2020

Mark's Mural - Mr Men

Here is my answer to this months Colour, Stories, Inspiration (CSI) Cold Case No. 338.
To go with the 'scene' colour scheme, I chose this photo of my nephew in 1987. I painted this Mr Men mural on his bedroom wall for him.

See the list of clues for this challenge below.
I managed to achieve the following:
* Older papers that match some of the colours in the scene - Echo Park Country Drive and Farm Girl collections
*Older Papers with stripes
*Use older kitchen or home themed elements - Spoon charms to reflect the boy eating on the mural.
* Use older metal items - Spoons
* Use paint that you havent used in a while - old acrylic paints to add colour to the tips of the brushes
* Use old stickers - from the Echo Park Farm Girl collection and

Basic Grey letter stickers
* Use a stamp you havent used before - Woodware Art Easel set for the paint brush


That'a all for today, thanks for looking.
Lynn x

Tuesday 24 November 2020

Brothers

This is another layout for my nephew's album, this one shows both my nephews in a pencil drawing by my father, reated for them in 1995. 

For this page I used:
Basic Grey - Max and Whiskers collection
Various Basic Grey alphabet stickers ,
Fairly quick layout, very flat - not many lumpy embellishments - not like me!!

Thanks for looking, There will of course be another layout with this photo for the other brother.
Lynn x


Monday 23 November 2020

Mother of the Bride

Here is another layout for the FTLOPP (for the love of pretty paper) Be Colourful challenge, - Here is my layout for week two - FANTASTIC FUCHSIA

I used this photo of my daughter standing with me outside Cooling Castle just before her wedding July 2019. Another page for George and Catherine's Wedding Album.


I used:
Several papers from the Kaisercraft Magenta collection
Alphabet Stickers from three different companies
Sizzix rosette Thinlits die
flat backed pearls
Wild Orchid Crafts paper flowers
Martha Stewart frond punch
Picked Raspberry Distress Ink

Thanks For looking
Lynn x

Sunday 22 November 2020

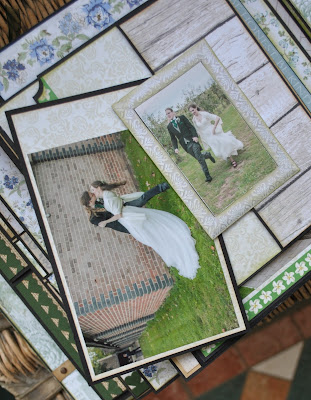
Wedding Album for Emily and Jack

It's now three years since Emily and Jack's wedding, and it's taken a while to put this 'not so mini' - mini wedding album together for them. I love the work of Scrap Queen, who designs and makes scrapbook albums, with very clever pockets, flaps and various other ingenious ideas for presenting treasured photos. You can see this talented lady's work in many Youtube tutorials, which are informative, creative and amusing. This album is based on Scrap Queen's Grand Hotel Stamperia Mini Album.


I have placed a video of the complete album on Youtube and it can be found HERE.

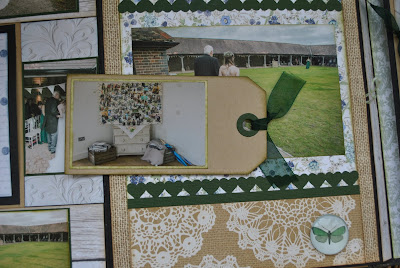
For the cover - the large frame has a piece of acetate over the window and a photo can be placed inside, it is easy to change this photo if needed.

The spine has the words ‘The Wedding of’ near the top and the name of the bride and groom on the pocket near the base. The pocket contains a tag with the date of the wedding. The lettering was cut from Avocado Bazzill with the Windsor Tonic Studio upper and lower alphabet and numeral dies.


On the back cover there is a Tim Holtz bookplate with the year, this holds a corded tassel in place, which in turn wraps around to the front, to hold the album closed by being wrapped around a decorative button. 

Inside the front cover is a pocket with a flap designed to look like a suitcase. Inside this a small notebook is stored for the bride and groom to make notes about their day. I plan to add the recipe for the wedding cake and other details like the dress etc. I covered the note book with patterned paper.


The case closes with magnets and the straps were decorated with brads. I punched a label and added more die cut letters.

On page one I have chosen to feature preparations for the wedding. This page has a series of flaps and pockets which open out to tell more of this story. The page shows a portrait of the girls in a frame made with an old Sizzix oval frame die, this in turn is mounted onto a pocket which holds a tag for a total of four small images. 


The front of this page is held in place with a key turn secured by a brad. Swing the key to one side to open two flaps and reveal what’s hidden inside. 


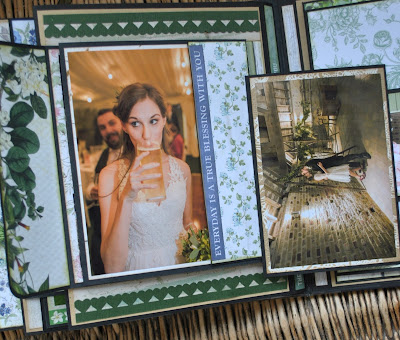
Page two is decorated with two Kaisercraft Curios. This page has two pockets which have flaps, held in place with magnets. Each pocket contains a tag with a photo on each side.


There is a flap with a photo, held in place with a wooden button and a loop of Baker’s Twine. This opens out to show two more photos. Then the whole page opens out to display more photos, and a tag with two much smaller pictures.


There is also a tag with a photo on each side.

 
Page three has two large pockets. The smaller one was made the right size to hold one of the wedding invitations.

The larger pocket houses a folder for more photos. The subject for this page is the ceremony.


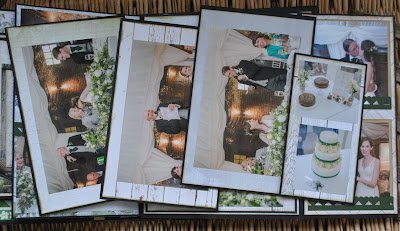
Pages four and five are a mirror image of each other, the flaps on both pages hold six small cards, with photos mounted on both sides. These photos show lots of images of the guests.


When these flaps open out there are more photos underneath.


Page five is a waterfall style presentation with lots of group photos.
I found a lovely mother-of–pearl button to hold it flaps shut using twine and a tiny key charm.


Page seven is a pocket page at the front. Both these little flaps have pockets on their fronts to hold tags with photos on both sides. One side of each flap is held in place with a magnet under the tiny leaf embellishment. There is another folder tucked under a big pocket on this page. This is pulled out by another tassel.


Page eight opens out in four directions and holds lots of pockets and tags. The subject is the photo shoot in the grounds and orchard.


Onto page nine - which starts with a framed photo of James and Emily cutting the cake, and the flap for this page is held in place with a key charm turner, secured by a brad.

This page is all about the cutting of the cake and the speeches. It opens out on both sides to reveal more photos and a central pocket holding four cards, with photos on both faces.


Page ten has a flap and pocket at the front, then opens out four ways to reveal even more images. These photos were all taken after dark, when the photographer took the couple around the venue again. 


Inside the back cover is this clever arrangement for lots of small photos of the
Cèilidh dancing and the musicians. 


The framed photo slides up to allow you to view the photos hidden away under the bottom two flaps and vice versa.


To finish and protect the album when in the bookshelf, I made a box with more chipboard and paper, but no decorations which might otherwise become damaged in storage. 

For my version of the album I used the following items:
Craft UK Premium 12" x 12" 250gsm  Black cardstock
A4 160gsm Black Cardstock
Kraft and Avacado Bazzill as this was used to make the invitations and other accessories for the wedding.
Most of the patterned papers I used were from the Kaisercraft - Wandering Ivy collection.
A few papers were from other Kaisercraft collections.
Chipboard
Duct Tape
Forest Moss Distress Ink Pad for inking the cut edges of papers
Martha Stewart Heart Border Punch
Tonic Studio Upper & Lower case Alphabet and Number Dies
Organza ribbon as used for the invitations.

Acknowledgements:

Music on video was played for Emily's entrance to the ceremony - Rohan Fanfare Theme, from The Lord of the Rings films, Emily and Jack chose the violin version played by Lindsey Stirling.

Wedding Venue - The Night Yard, Bridge, near Canterbury, Kent

Many of the photos were taken by Richard - The Other Day Wedding Photographer, others by friends and family. 

Thanks for looking, and now I move on to make an album for Catherine and George's more recent wedding (2019).
Lynn x