h3.post-title font-family: 'Bad Script', cursive
Showing posts with label Water colour paper. Show all posts

Thursday, 17 September 2026

Birthday Cards - Tim Holtz Mixed Media

Here is a small collection of cards I made using Tim Holtz products. It's amazing how different they all turned out, the beauty of the randomness of mixed media.


Items used for these cards:
Watercolour paper
Distress Mica Stain - Hocus Pocus
Distress Oxide Inks - Dusty Concord, Victorian Velvet, Seedless Preserves, Villainous Potion, Wilted Violet & Shaded Lilac
Distress Ink - Villainous Potion
Distress Paint - Picket Fence
Versafine Ink Pad - Black Onyx
Tim Holtz Sizzix Thinlits Dies - Detailed Butterflies, Festive Greens and Stacked Tiles - Hexagons
Tim Holtz - Idea-ology - Pen nibs
Vellum
6" x 6" white card blanks & envelopes

Tim Holtz Stampers Anonymous Stamp Sets - Papillon & Simple Sayings


Thanks for looking, back with more soon.
Lynn x

Sunday, 28 September 2025

Sizzix Eileen Hull Collection - Rainbow Wheel

I recently purchased a set of Sizzix products designed by Elaine Hull from Papermaze. They included: A5 Clear Stamps Set 24PK - Swatch Cards, Thinlits 9PK Die Set - Rainbow Wheels and Layered Stencils 3PK - Colour Wheel. This collection together with my Distress Inks gave me a variety of possibilities. There are plenty of ideas on the Sizzix web site including links to some You Tube videos. 

Here is a selection of things I made using these new tools:


First of all I made a layout, based on an idea by Jess Jones of Sizzix and changed to meet my plans. 


I cut some scrap paper down to 11" x 11" and placed it in the centre of the 12" x 12" Smooth White Bazzill, I had selected for the layout. I used the smaller piece as a mask, and with a blending tool I inked Distress Inks around the edge of the layout in a rainbow sequence. I removed the mask and flicked some of the colours over the page.  

I stamped the above image onto watercolour paper, and  cut it out with the largest circle die. Then I used Distress Inks, watered down on the craft mat and painted the segments. 


With the stencils I created the colour wheel above onto watercolour paper, then covered it by cutting the overlay from white cardstock and sticking it in place over the top. I trimmed the stencilled wheel from under the die. I stamped the small wheel with 12 sections (also watercolour paper), and cut it out with the smallest circle die. I painted each section with more Distress Inks.  I cut three silver arrows using the dies, and attached them to the colour wheel centres, with small brads. 


I stamped the swatch card onto watercolour paper, and painted each panel as before, I stamped the 'colour swatch' phrase into place. I cut the card out with scissors. I also stamped three paintbrushes, painted them and cut them out. 


With a set of alphabet dies I cut my title from more watercolour paper, and painted each letter with a different colour of Distress Ink. All the elements and the photo were arranged onto the page and stuck in place. I added the date with some Doodlebug Designs Rubons. 

Next, I made a set of three Birthday cards using similar techniques to the layout, various card blanks and some scrap patterned papers. 


I decided as the small colour wheel has sixteen little pallets and the Distress Ink and Distress Watercolour Pencil tins each hold the same number of inks or pencils, that I would use the stamps and dies to organise and label my tins.


The pencil tins already have an acetate sheet to protect them, so I attached the colour wheels to this, so it shows through the lid. I wrote the initials of each colour over the inked colour. For the Distress Inks, I cut a piece of acetate to fit over the inks, and rounded the corners with a punch. I used this to attach the colour wheels.


I hope this has been useful and interesting. 
Thanks for looking.
Lynn x

Friday, 29 November 2024

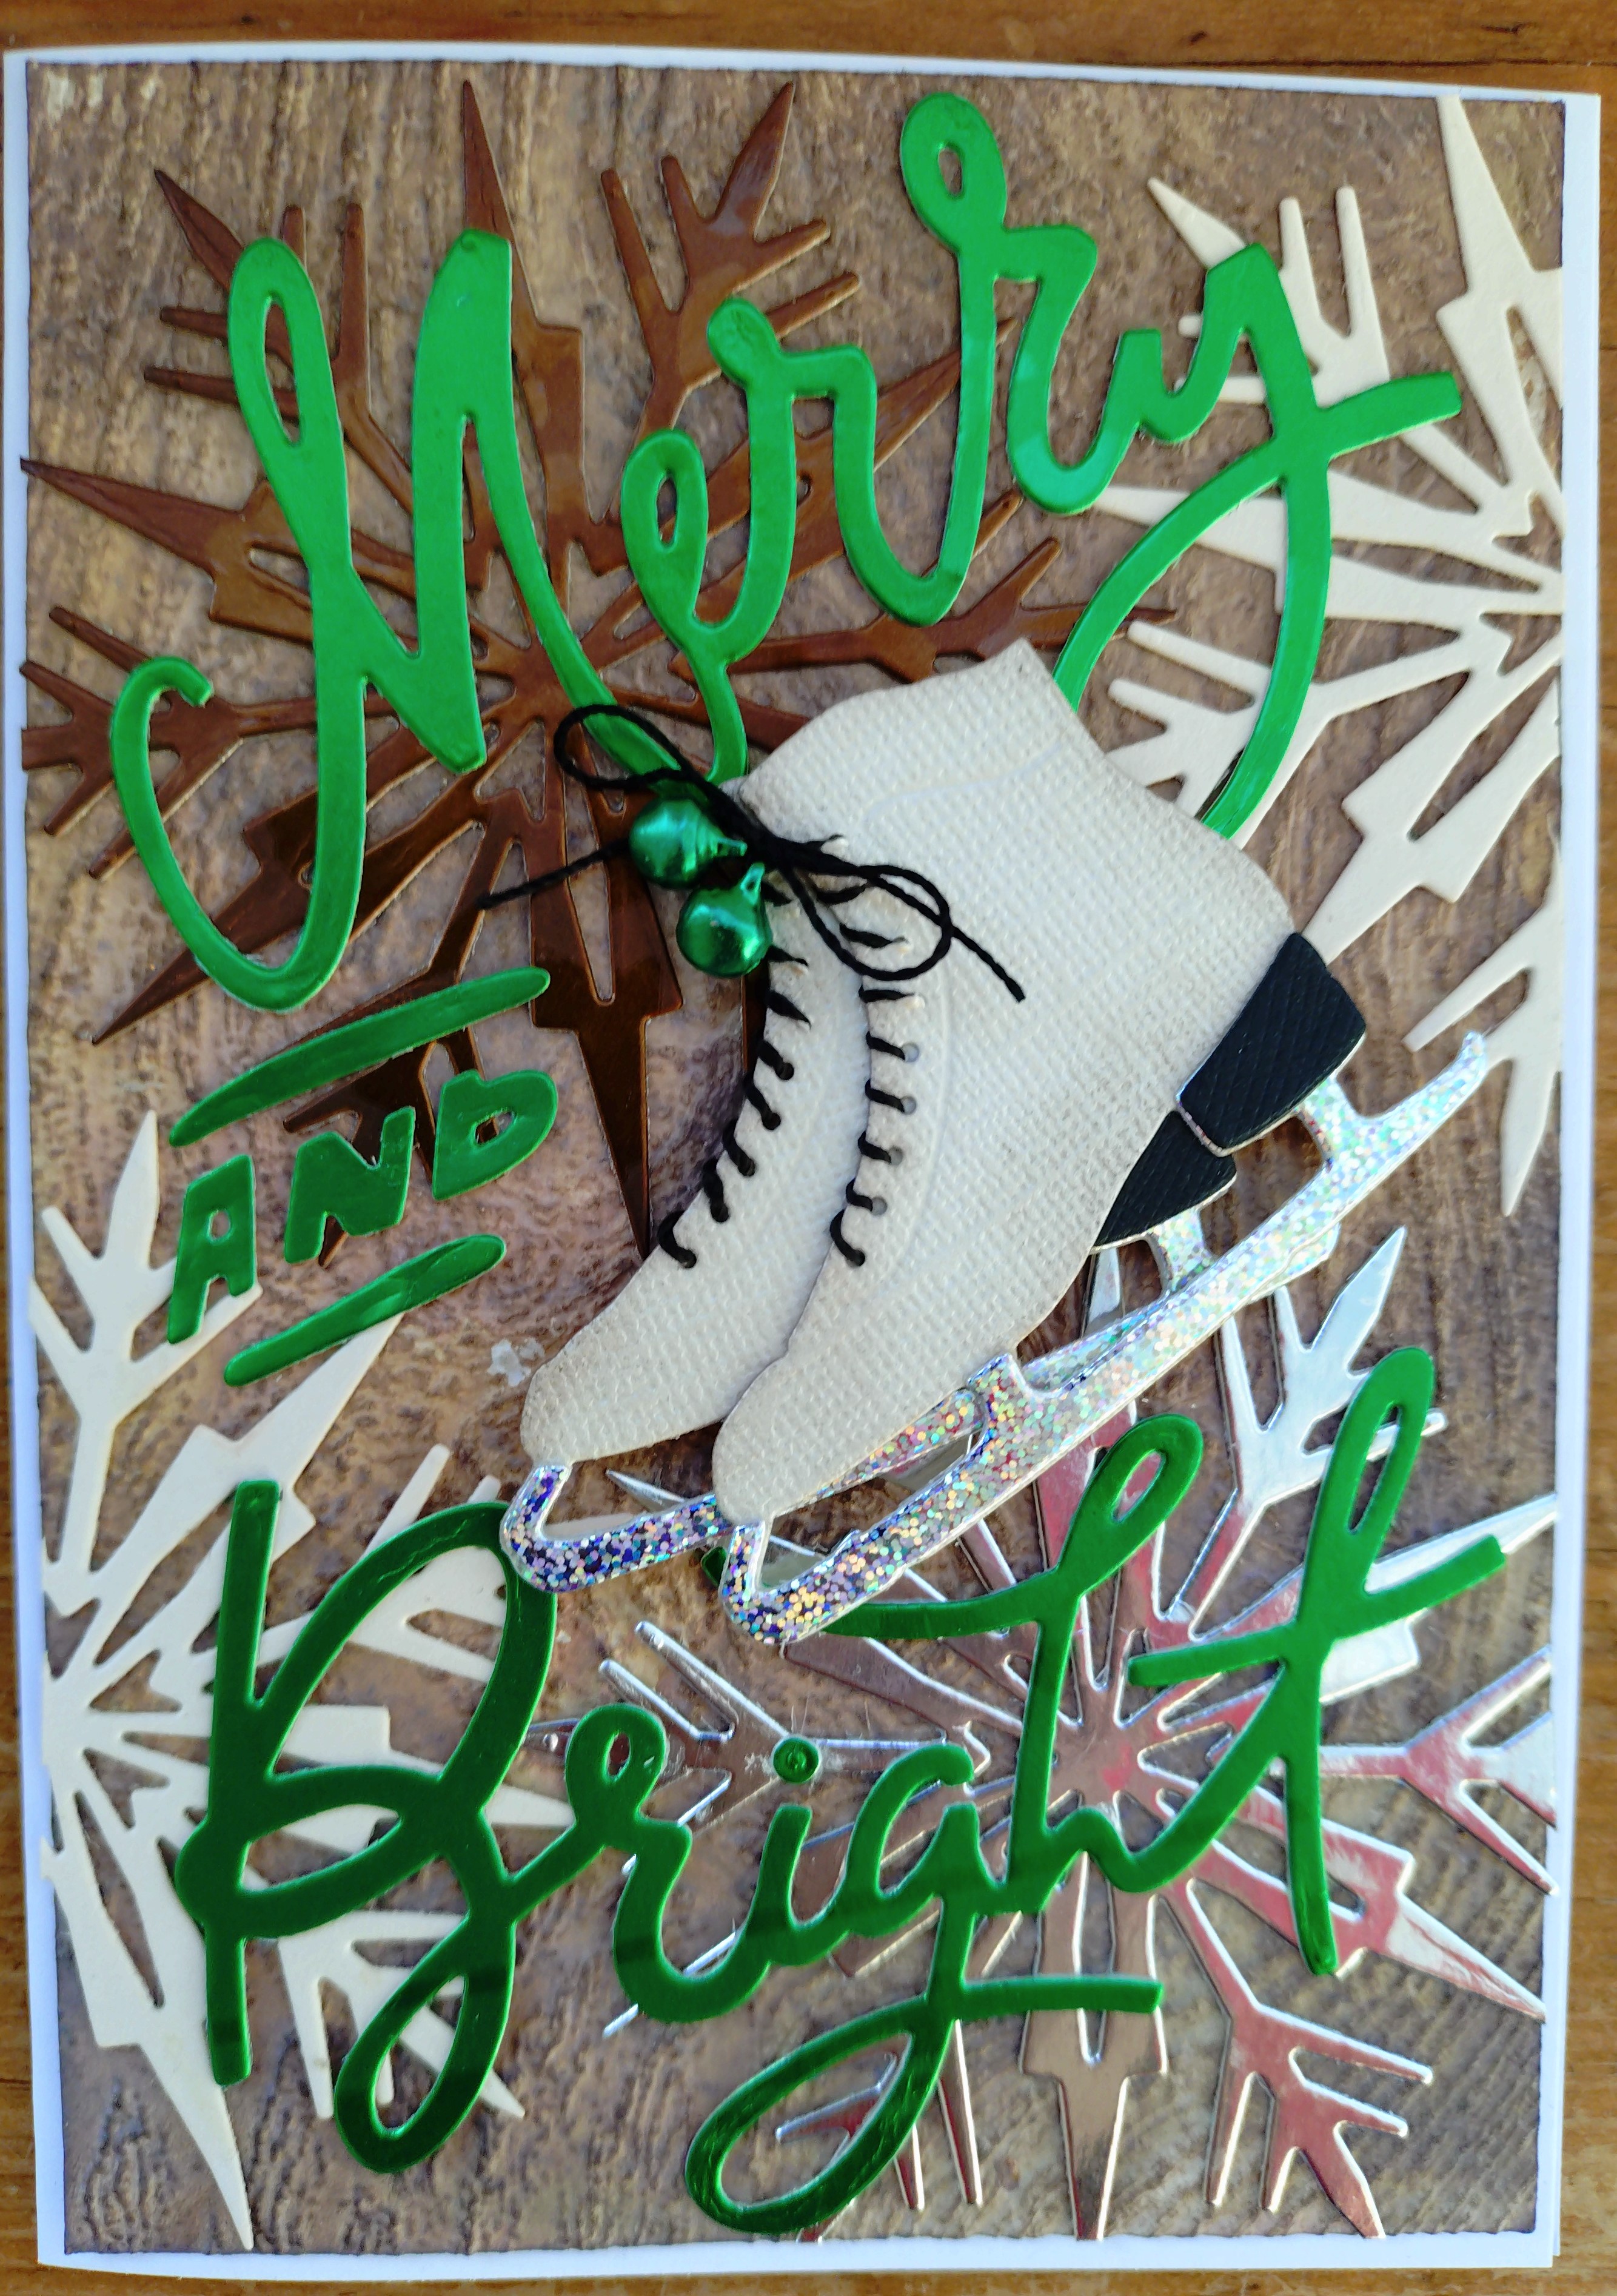
Vault Winter Wishes - Sizzix Christmas Cards

Today I'm sharing some Christmas cards I made using one of the Vault Christmas Sizzix Die Sets from Tim Holtz. I added in another of Tim's die sets and some 3D Texture Fades. Then got busy creating backgrounds with some multi media.


I used:

Sizzix Tim Holtz Thinlits Die - Vault Winter Wishes
Sizzix Tim Holtz Thinlits Die - Merry and Bright
Sizzix 3D Texture Fades - Arched, Brickwork, Lumbar, Quilted, Sparkle and Woodgrain.
Distress Oxide Inks
Distress Inks
Tiny Bells
DMC Crochet Cotton
Watercolour Paper
Card Blanks and Envelopes

Selection of cardstock and metallic cardstock scraps
3D Foam Pads

      
For each card I trimmed a piece of watercolour paper to measure slightly smaller than my card blank. I placed a selection of colours of Distress Oxide ink onto a messy mat. spritzed them with water and ran the paper back and forth through the colours to create the background for the card.

While the paper was still slightly damp, I place it into the 3D Texture Fade folder, and passed it through the Sizzix Big Shot. Then this was set aside to dry off completely.

I highlighted the embossed patterns by rubbing over with some Distress Inks and a blending tool.

With the Winter Wishes Die set, I cut two ice skates, heels and blades and three snowflakes,  from a selection of the scraps of cardstock and metallic card I had collected together. I also used the Merry and Bright die set to cut the phrase in metallic card.

I applied the snowflakes to the background, overlapping the edges in places and trimmed off the excess. This was then stuck to the front of the card blank.

I added the greeting placing it as seen in the photos.

Next I made up the ice skates, stitching the crochet cotton through the tiny holes in the boots to make them appear to be laced up, leaving enough
cotton to tie on the bells later. I placed one boot over the other at a slight angle so you can still see they are a pair. Then I tied the laces together in a knot. I threaded a tiny bell onto each lace, then tied the laces together into a bow, and trimmed the ends off neatly.

With 3D foam pads applied to the back of the ice skates, I attached them to the centre of the card.

Here is a closer view of each card.


That's all for today. Back with more for Christmas soon.
Lynn x

Sunday, 20 March 2022

You Colour My World

For the March Peartree Cutfile Design Team challenge we were challenged to use the 'You Colour My World' Cutfile.


I chose this photo of my son on holiday in Norfolk in his colourful rugby top.


I used black Bazzill cardstock
Some old patterned paper
Ecoline Coloured Inks
Watercolour paper

Thanks for looking
Lynn x

Wednesday, 16 March 2022

Janet

I was on the Scrap, Paper, Scissors Blog today to show you the March Papermaze kit, which is now available in the shop and online. A varied collection of papers, embellishments and cardstock. I have two layouts to share, here is the first - Janet - This photo from the 1950's is another for the family history album. 


From the Kit I used:
Blackberry Swirl Bazzill
Carta Bella - Gather At Home - Fresh Floral
heart doily
grey pearls

From my stash I used:

Peeled Paint and Iced Spruce Distress Oxide Spray
Distress Oxide Inks
water colour paper
Tim Holtz, Sizzix, Thinlits sets - Brushstroke Flowers #1 and Bloom Colorize
Cricut


Thanks for looking
Back tomorrow with the second layout
Lynn x

Monday, 9 August 2021

Big Friendly Giant - Helen's Dream

Catherine and I walked the Big Friendly Giant Trail back in 2016 - well the London bit anyway. She clocked up 35000 steps that day! Here she is with Helen's Dream (Helen Mirren) - I dream of England which features an oak tree. This jar was situated in Soho's golden Square.


The layout answers the brief of two challenges - PEartree cutfile and DAF.
The Peartree Cutfile challenge was to use Green - I used two cutfiles 'Dream Big' and the 'Jar of Hearts'.
The DAF challenge was a Grab 5 challenge and the items to include were:
Flair - 2
Alphas - the cutfile, letter and number thickers and Hobbycraft stickers
Rainbows - on the flair
Washi tape - green dots from Lidl
Patterned paper - Vicki Boutin - Color Study

I also used:
Distress Oxide Inks
Watercolour paper
Vellum
Nuvo Glitter Drops
Gems


Thanks for looking
Lynn x