h3.post-title font-family: 'Bad Script', cursive
Showing posts with label card blanks. Show all posts

Thursday, 17 September 2026

Birthday Cards - Tim Holtz Mixed Media

Here is a small collection of cards I made using Tim Holtz products. It's amazing how different they all turned out, the beauty of the randomness of mixed media.


Items used for these cards:
Watercolour paper
Distress Mica Stain - Hocus Pocus
Distress Oxide Inks - Dusty Concord, Victorian Velvet, Seedless Preserves, Villainous Potion, Wilted Violet & Shaded Lilac
Distress Ink - Villainous Potion
Distress Paint - Picket Fence
Versafine Ink Pad - Black Onyx
Tim Holtz Sizzix Thinlits Dies - Detailed Butterflies, Festive Greens and Stacked Tiles - Hexagons
Tim Holtz - Idea-ology - Pen nibs
Vellum
6" x 6" white card blanks & envelopes

Tim Holtz Stampers Anonymous Stamp Sets - Papillon & Simple Sayings


Thanks for looking, back with more soon.
Lynn x

Friday, 29 November 2024

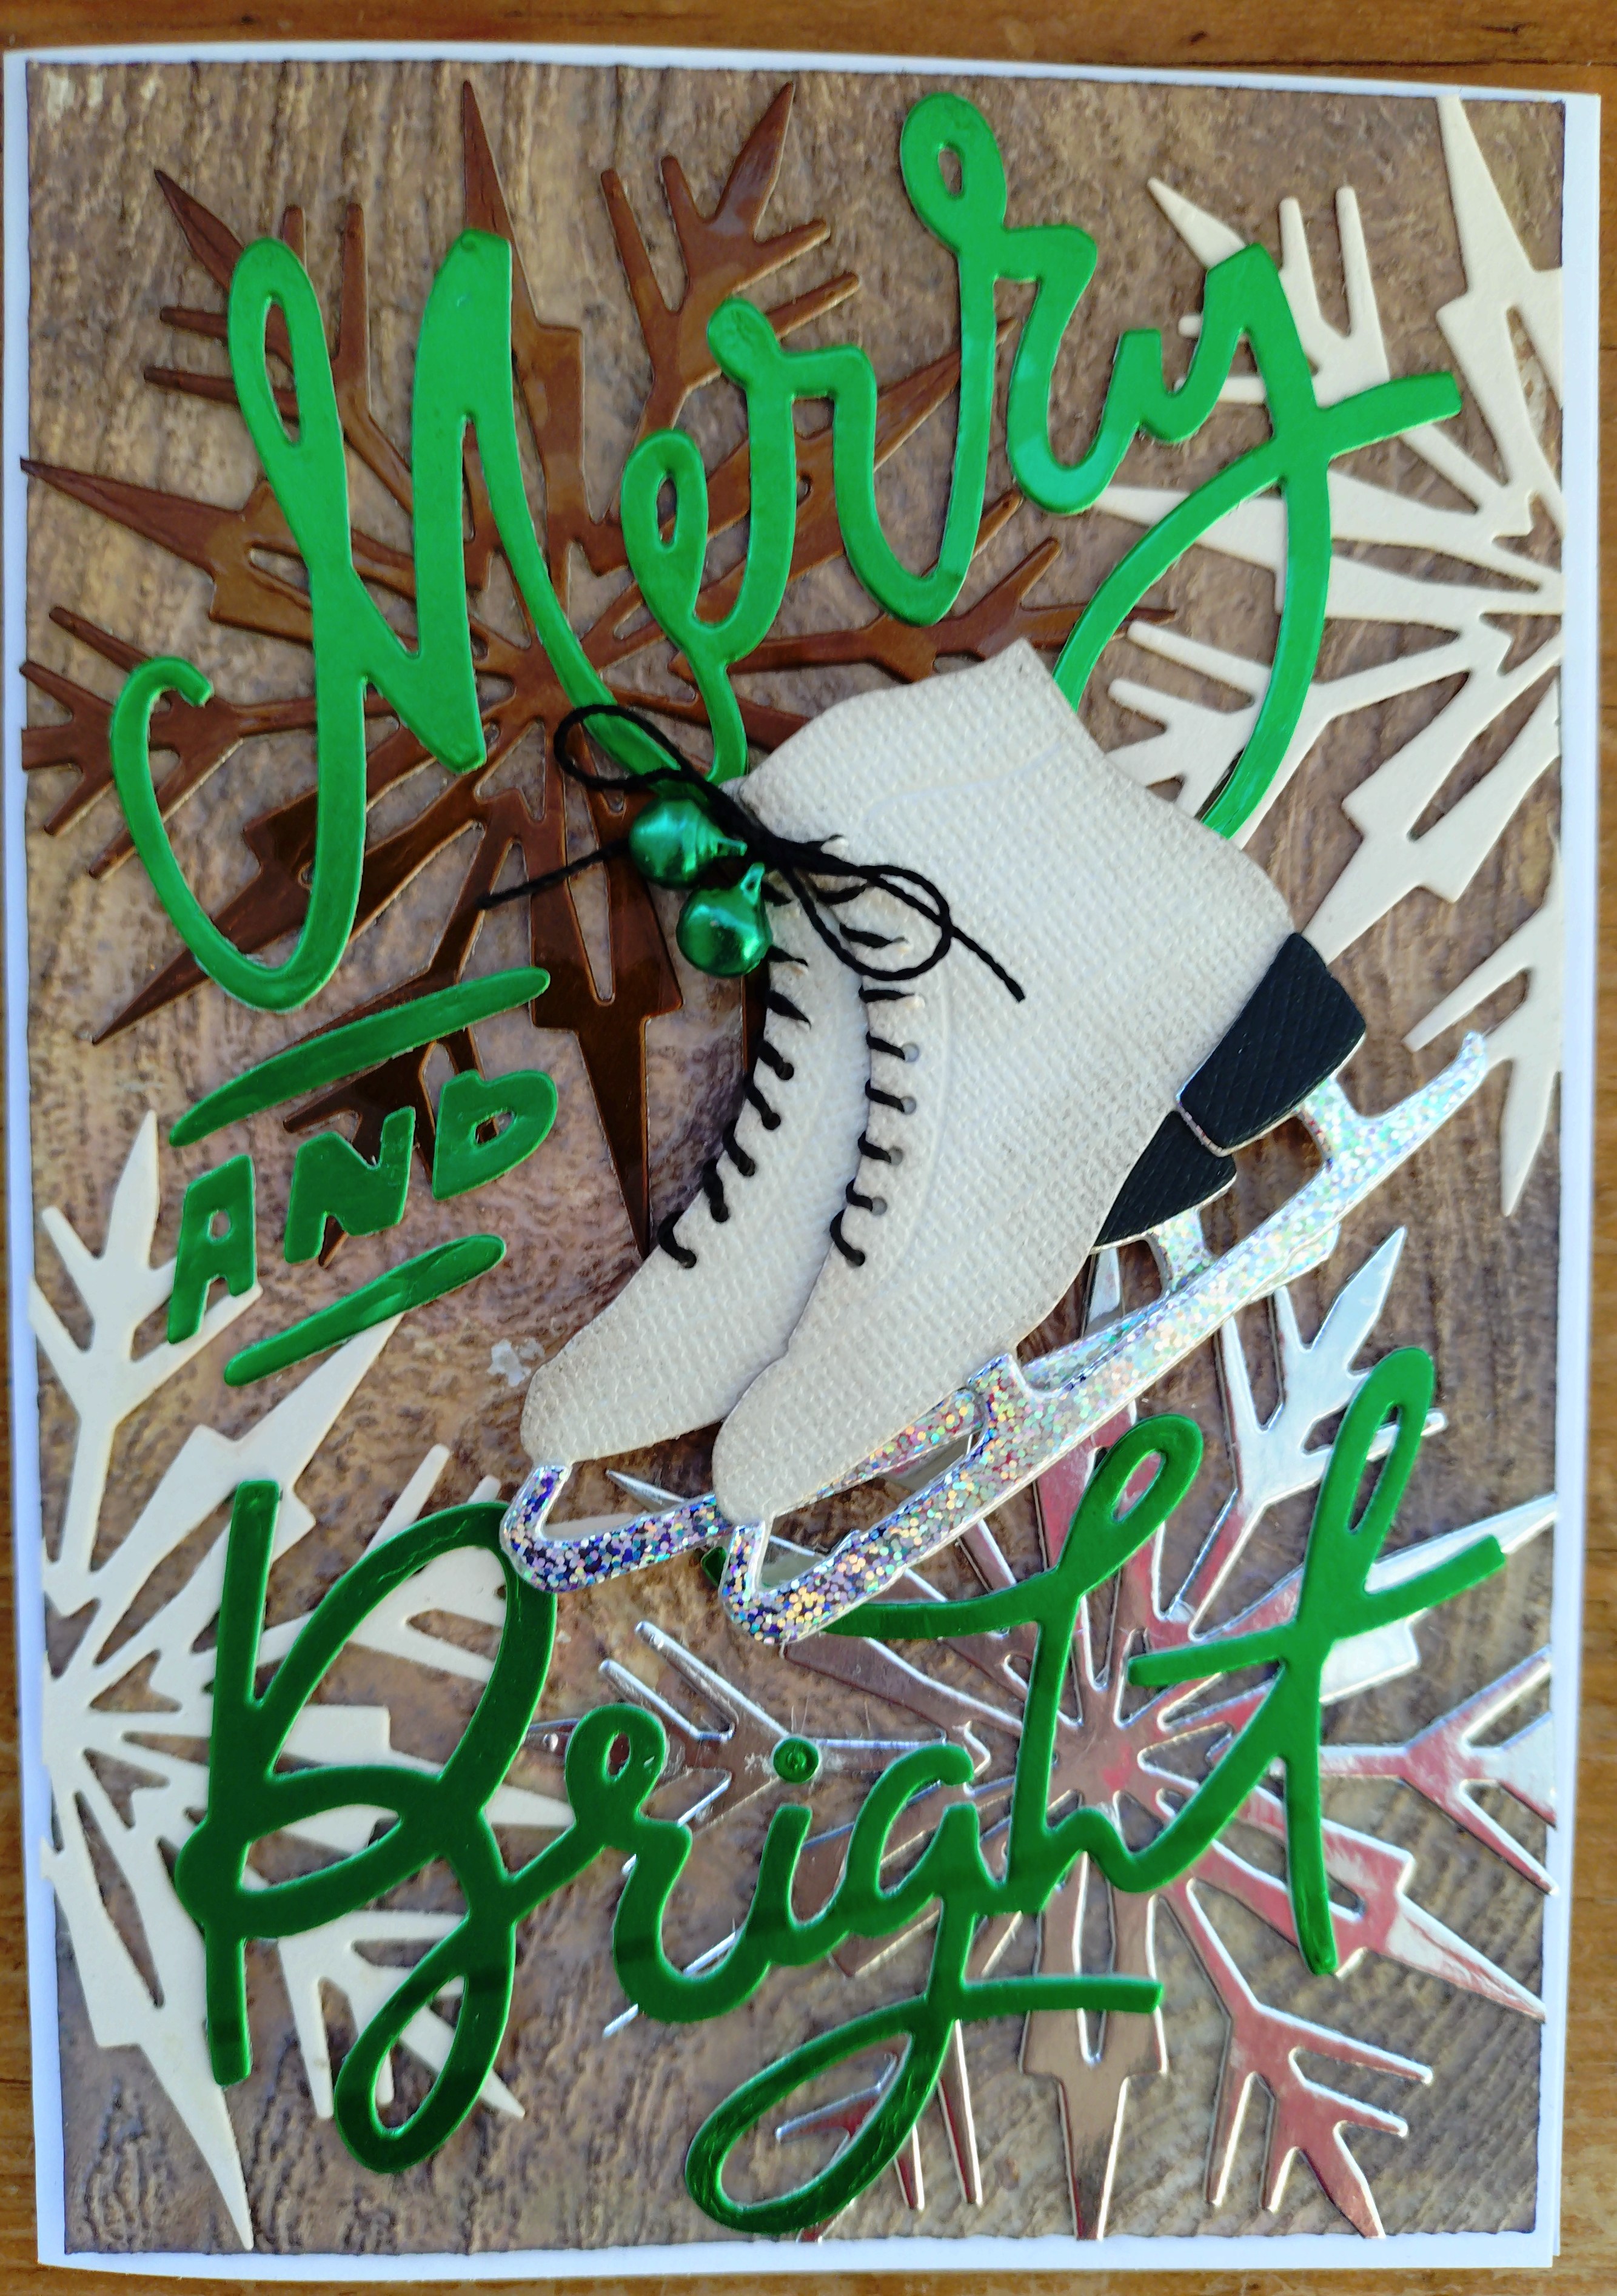
Vault Winter Wishes - Sizzix Christmas Cards

Today I'm sharing some Christmas cards I made using one of the Vault Christmas Sizzix Die Sets from Tim Holtz. I added in another of Tim's die sets and some 3D Texture Fades. Then got busy creating backgrounds with some multi media.


I used:

Sizzix Tim Holtz Thinlits Die - Vault Winter Wishes
Sizzix Tim Holtz Thinlits Die - Merry and Bright
Sizzix 3D Texture Fades - Arched, Brickwork, Lumbar, Quilted, Sparkle and Woodgrain.
Distress Oxide Inks
Distress Inks
Tiny Bells
DMC Crochet Cotton
Watercolour Paper
Card Blanks and Envelopes

Selection of cardstock and metallic cardstock scraps
3D Foam Pads

      
For each card I trimmed a piece of watercolour paper to measure slightly smaller than my card blank. I placed a selection of colours of Distress Oxide ink onto a messy mat. spritzed them with water and ran the paper back and forth through the colours to create the background for the card.

While the paper was still slightly damp, I place it into the 3D Texture Fade folder, and passed it through the Sizzix Big Shot. Then this was set aside to dry off completely.

I highlighted the embossed patterns by rubbing over with some Distress Inks and a blending tool.

With the Winter Wishes Die set, I cut two ice skates, heels and blades and three snowflakes,  from a selection of the scraps of cardstock and metallic card I had collected together. I also used the Merry and Bright die set to cut the phrase in metallic card.

I applied the snowflakes to the background, overlapping the edges in places and trimmed off the excess. This was then stuck to the front of the card blank.

I added the greeting placing it as seen in the photos.

Next I made up the ice skates, stitching the crochet cotton through the tiny holes in the boots to make them appear to be laced up, leaving enough
cotton to tie on the bells later. I placed one boot over the other at a slight angle so you can still see they are a pair. Then I tied the laces together in a knot. I threaded a tiny bell onto each lace, then tied the laces together into a bow, and trimmed the ends off neatly.

With 3D foam pads applied to the back of the ice skates, I attached them to the centre of the card.

Here is a closer view of each card.


That's all for today. Back with more for Christmas soon.
Lynn x

Wednesday, 30 March 2016

Experimenting with Fusible Film and Fibre!

While looking for something else (acetate sheets), I found my box of fusible film and fibre! I decided to have a play with some recent stamps. I made these two cards with the results.


I tried out using fibres sandwiched between two sheets of film and I then using the fibres on their own.

Here you can see a comparison of the finished effects, the first item in each photo is fibres only and the second is film and fibres:

The bird stamp is from Tim Holtz Bird Crazy Set 


The Stamps are from JOFY. The flowers were all made with fibres only.


I also used:
Black Staz-On Ink pad
Sizzix die Spring Greenery
Black Bazzill Cardstock
White Gel Pen
Liquid Pearls
Distress Paints
Distress Ink Pads
Water colour paper
6" x 6" card blank
4" x 4" card blank
Memory Box Thank You Die
White flowers from an Easter egg

Thanks for looking
Lynn x

Saturday, 26 March 2016

A day with the Cricut for Easter Greetings

I dusted off the Cricut the other day as I decided I would make some Easter cards and needed quite a few. I had already downloaded a few SVG files from My Scrap Chick and thought these would make quick, cute cards. The other benefit was to make me use up lots of scrap cardstock and patterned papers.

Here are some of the creations:


I used a greeting stamp bu Lili of the Valley, and circular punches by Stampin' Up and Woodware. All the pieces were inked with either Chalk Inks or Distress Inks. I used a selection of card blanks from mys stash. All of these cards are 6" x 6".

I also cut many more images while I was busy cutting these, and I will show you these another day.

My Scrap Chick have recently improved all their SVG files for better cutting and fold lines with the Cricut, so if you tried before will limited success it is now worth trying again.

Thanks for looking
Lynn x