h3.post-title font-family: 'Bad Script', cursive

Wednesday, 30 November 2011

Lost and Found Angels

Or Christmas Wishes Sent To You

The next card features the same three angles surrounded by these lovely My Mind's Eye papers - Lost and Found.


For this one I used:
Pens - Promarkers
Card blank - Craftwork Cards
Patterned papers - My Mind's Eye
Punches - 2" scallop circle - Woodware
Others ribbon bow, perfect pearls, gems, brad, scrap of cardstock (Stampin' Up)

Thanks for looking.
Lynn x

Tuesday, 29 November 2011

May Your Days Be Merry and Bright

Or More Angels!

Back with another card made with the same Lili of the Valley Stamp 'Three Little Angels'


This time I went for a coral colour scheme and I have used :

Cardstock - Stampin' Up - Calypso Coral, Bazzill white
Patterned papers - Stampin' Up Paper Stack - Calypso Coral
Stamps - Lili of the Valley 3 Little Angels and Circle Christmas Greetings
Punches - Martha Stewart Border, Woodware 2" scallop circle
Inks - Stampin' Up Calypso Coral
Other - Stickles, Gems, Perfect Pearls, paper roses, ribbon bow.
Pens - Promarkers
Card Blank - Craftwork Cards

I have still more cards with these angels to show you if you have not given up and are still following! 
Thanks for looking


Lynn x

Monday, 28 November 2011

Three Little Angels

Another card made with Promarkers, Stampin' Up goodies and my Lili of the Valley Christmas stamps, featuring the three little angels stamp again.


I added lots of sparkle with stickles in different colours to the wings, dresses, clouds and stars. My gems are a selection of different makes including Prima. I first used this fold on a card I made at a STampin' Up Class taught by Natalie O'Shea.

I'm entering this into the Lili of theValley Challenge for this week - Anything Goes
I have used :
Cardstock - Stampin' Up & Bazzill
Stamps - Lili of the Valley 3 Little Angels and Circle Christmas Greetings - Stampin Up Pines and Poinsettias
Punches - Woodware 2" scallop circle
Inks - Stampin' Up Cherry Cobbler, Wild Wasabi and Versamark
Ribbon - Stampin' Up Scallop Dots in Cherry Cobbler
Other - Stickles, Gems, paper roses
Pens - Promarkers

More cards to follow.
Thanks for looking
Lynn x

Saturday, 26 November 2011

~ * ~ Swirls and Sparkles ~ * ~

Or Silent Night, Holy Night

I have been playing with some favourite products, Promarkers, some Stampin' Up goodies and my Lili of the Valley Christmas stamps and trying to get some Christmas Cards made.


 I managed to take this photo before it became too dark, but I think this will need taking again in brighter light tomorrow. I added lots of sparkle with stickles in different colours to the wings, dresses, clouds and stars. My swirls are made from Prima gems, so they sparkle too. Not sure the full extent of the sparkle effect shows on the photo.

I'm entering this card into this weeks Passion for Promarker Challenge 127 Swirls and Sparkles and this weeks Lili of the Valley Challenge blog challenge 122 - Anything Goes!.

I have used :
Cardstock - Stampin' Up Island Indigo and Baja Breeze
Patterned papers - Stampin' Up Paper Stack - Island Indigo
Stamps - Lili of the Valley 3 Little Angels and Circle Christmas Greetings
Punches - Stampin' Up Scallop Trim Corner & Scallop Trim Border, Woodware 2" scallop circle
Inks - Stampin' Up Island Indigo
Other - Stickles, Gems, Perfect Pearls, paper roses
Pens - Promarkers
Card blank - Craftwork Cards

I made a few more cards with this delighful stamp and will show them to you as we go through December.
Thanks for looking
Lynn x

Monday, 21 November 2011

A Beautiful Autumn Day


Sunday the weather was very misty, but we got the bikes ready and headed off into the Rendlesham Forest. As we drew nearer the sun cam out and the mist disappeared. We had a lovely ride around the forest, showing Robert and Elaine the area.


Then we drove into Orford for a lovely lunch and an antique fair then onto Snape in the afternoon.


A lovely weekend thanks Elaine and Robert.

Sunday, 20 November 2011

In and around Woodbridge

My brother Robert and his girlfriend Elaine came for their first visit to us in Suffolk, so on Saturday we decided to take them to explore in and around Woodbridge. We were so lucky with the weather - it was a beautiful autumn day.

We walked along the river front from the Marina.

Warning picture heavy post!


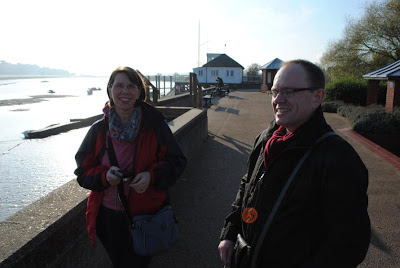
 Elaine and Robert


Lynn, Elaine and Alan 

Robert's picture 


Coffee and cake in 'The Tea Hut' 


Followed by walking through the town for some shopping and lunch in the pub before more shopping. We got Elaine some wool and and we started her knitting, her first project is a West Ham scarf for Robert - of course!

Wednesday, 16 November 2011

House Mouse Challenge on Scrapology.

Over on Scrapology this month we are delighted to welcome Joanna Sheen and team on board as our sponsor. She has offered a £10.00 voucher to the winner of this month's challenge.

Here are my two examples for the DT gallery, House Mouse stamps coloured with Promarkers.


Joanna has asked us to make cards using the iconic House Mouse.
Don't worry if you don't have any, any mouse will do.
Here is Joanna's card

Hop over to Scrapology to see more details of this challenge and the design team gallery. /including our guest Scrapdolly and our two mew team members, Soojay and Sandra Dry.

Friday, 11 November 2011

Relax and Recover

My sister had surgery to her hand last week, so I made her a card to wish her well.


As you can see I used more of the Cardinal Colours retreat kit left over from my Play-doh layout from Anita's class.
The image is from Kraftin' Kimmie available in the UK from Elaine at Quixotic Paperie.
Coloured with my Promarkers from Cardinal Colours.
Orange cardstock, ribbon, brads, blossoms, glitter, inks and pins from my stash.

Get better soon Sylvie and I'm looking forward to our weekend together very soon.

I'm entering this card into this week's Kraftin' Kimmie blog challenge #103 'Pin It Down'.
Thanks for looking.

Thursday, 10 November 2011

Rainbow Stripes with the triplets

Here is another layout made with a kit I brought home from Jill's Cardinal Colours Retreat. The class was designed and taught by the lovely Anita and you can see more details of the class on the Calendar of Colours blog. I finally got around to making this layout at Jill's crop last weekend.


The photograph was taken by my daughter Catherine, on her mobile phone, when she visited the triplets with her sister back in September.
The papers are Echo Park Summer Days collection, the kit included Alpha Stickers, Journalling Cards, Die Cut, Rainbow and Borders. Red and white baker's twine.

The papers reflect Heather's (the triplets mum) love of colourful stripes.
Zoe lent me her Stampin' Up Banner Builder punch and gave me these fantastic colourful buttons. Thanks Zoe.


Thanks for the great class Anita.
Here is Anita's original layout.


Thanks for looking.

Saturday, 5 November 2011

Happy Birthday Linda

It's Linda's birthday today and I made her a card, I used Bittersweet papers from Basic Grey and a Lili of the Valley stamp. With gems, ribbon, stickers, promarkers and stickles. I made the card using the twisted easel card idea from last weeks class. The scalloped heart was cut on the Cricut. As Linda is a cat lover I thought this was just the image for her.


The prop is a row of heart stickers from the Bittersweet Basic Grey element sheet, with lots of stickles and 3D foam pads to raise the height. 
Basic grey stickers for the name.

The open card 

Close up

I am entering this card in the 119th Lili of the Valley Challenge - the theme this week is 
 BRIGHT AND SPARKLY in honour of Bonfire Night..


Hope you have a happy birthday Linda. x

Friday, 4 November 2011

Stop Press!


So proud of Emily on having her story published today in Cadaverine Magazine.
Very topical story for the time of year too.

Well done sweetheart. xxx

Seam Binding Ribbon Roses Tutorial

Here is a tutorial for making the seam binding ribbon rose I made for my November Scrapology layout adapted from Crafty Ribbons instructions.
Using an embroidery stitch called Spiders Web Rose, but rather than sewing on fabric this uses card.

The completed rose.

1. Gather the bits you need around you, scissors, large needle, thread, tape, card and about two metres of seam binding ribbon (for a 6cm bloom).

2. On the card mark a five pointed star and the centre point, and pierce holes at these points. Thread the large needle with some sewing thread. I have used a bright contrasting colour thread for the tutorial, but it doesn't show when the rose is complete, so any colour will do. Secure the thread on the back of the card with a piece of tape. Sew through the holes to create what will look like Spiders Web.

3. Secure the thread on the back of the card with another piece of tape.

4. Thread the seam Binding ribbon into the big needle and sew through the centre hole leaving a small length at the back of the card that you can stick down with more tape.

5. This is the front view. The ribbon has come up through the centre, now pass the needle under one of the threads.

6. Allow the ribbon to cover over the next thread then under the next. It is IMPORTANT to continue working in the same direction at ALL times. Pull the ribbon so it is tight in the centre, but not so tight that it puts a strain on the threads. Continue with the weaving technique of over one thread under the next thread. As you have an odd number of threads (5) you will go round in a circle.

7. Keep going round, if you can still see the holes you need to continue. Allow the ribbon to twist, this will create more interesting shape rose petals.

8. This rose is almost finished, it requires no more petals.

9. To finish, take the needle back down through one of the holes. Secure the ribbon on the back with a piece of tape as before.
Cut away the excess card from around the completed rose. It is now ready to attach to your card or layout.

These instructions are adapted from those supplied by Crafty Ribbons, where I purchased the ribbons for this project and you will find plenty more colours on their website.